Setup an Indian Shopify store with my step by step guide with screenshot. Help you launch your own professional looking ecommerce Shopify store in minutes
Are you looking to set up an Indian Shopify store?
Let me help you with the step by step guide to get your eCommerce site up and running on Shopify in minutes even without any technical knowledge about domain or hosting for that matter.
Shopify is one of the easiest ways to set up an eCommerce store. It took me less than an hour to go live with my newly created Shopify store. One can get started in no time and start selling. Shopify does all the heavy lifting about managing the site so you can focus on managing your business and work towards making products better for your customer.
But first. . .
Table of Content
Why Shopify?
Shopify helps you build your eCommerce website in minutes without the need of any web designer or developer. You can start selling online on social media or in-person.
So some of the key benefits of using Shopify are:
- It is easy to set up without dealing with the technicalities of web development & hosting.
- The admin interface is intuitive and user-friendly.
- Wide range of themes to give a stunning look to your store.
- Amazing store customization capabilities.
- Third-party app integrations to customize the store.
- Shopify stores are super-fast speed, which helps in conversions.
- Advanced analytics, along with robust SEO features.
- Marketing tools like custom gift cards, discount coupons, store statistics, targeted email marketing, and more.
- Mobile responsive themes, along with sharing on social media integrated.
- Sellers can avail round-the-clock customer support via email, live chat, or phone to resolve queries.
Now let’s talk about a seller needs to kick start his/her selling business with Shopify.
Setup Shopify Store
Shopify offers a 14-day free trial to play around with the store without even requiring to add a credit card.
Sign Up
Sign up is easy. Go to Shopify.in and click Start Free Trial.
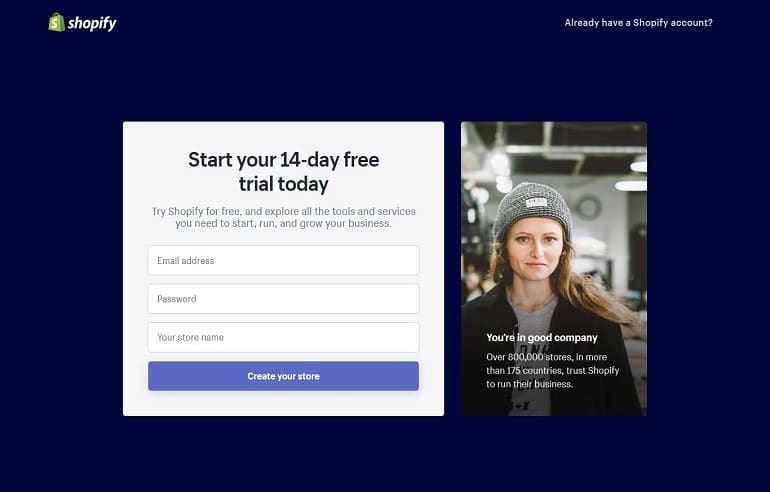
Enter an email address, password, and unique store name. Now hit the create your store button.
Add Details
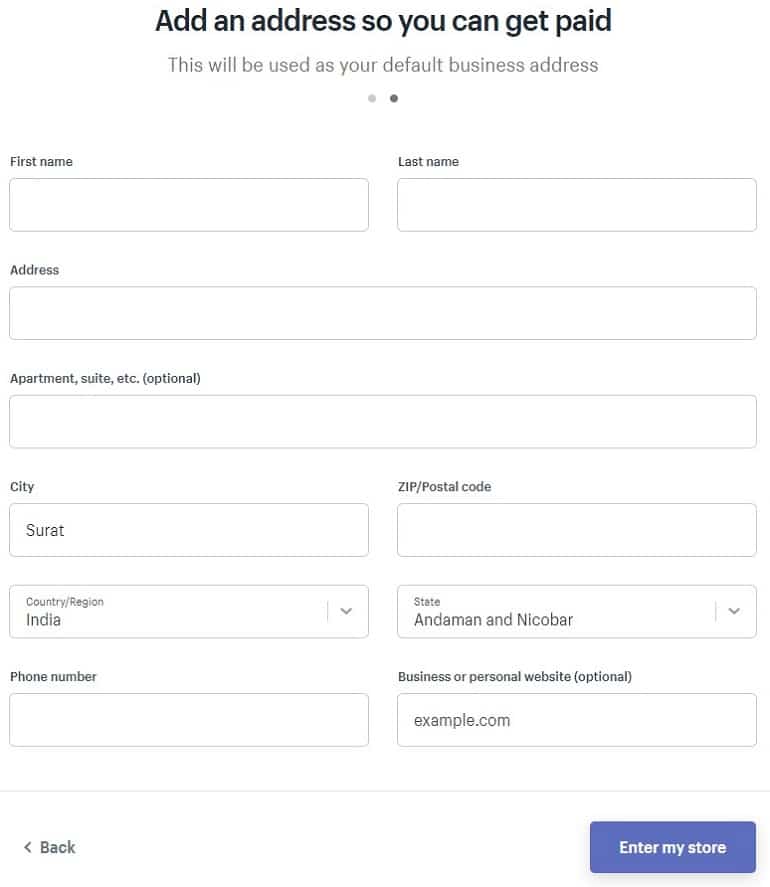
The next step is to add a few more details about products and existing sales channels. Once added, the registration process is complete.
Now let us navigate the seller dashboard.
The Shopify Dashboard
The seller dashboard is clutter-free.
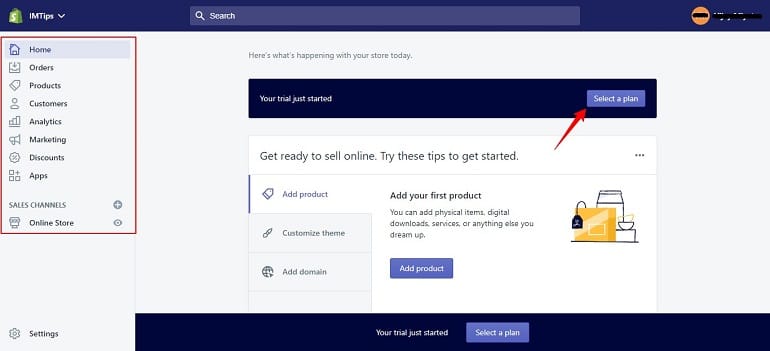
The left panel has all design, analytics, and marketing tools. Besides, the bottom left corner, there is a link for store settings.
Besides, the trial period, a seller has to select a monthly plan.
Choose the Right Monthly Plans
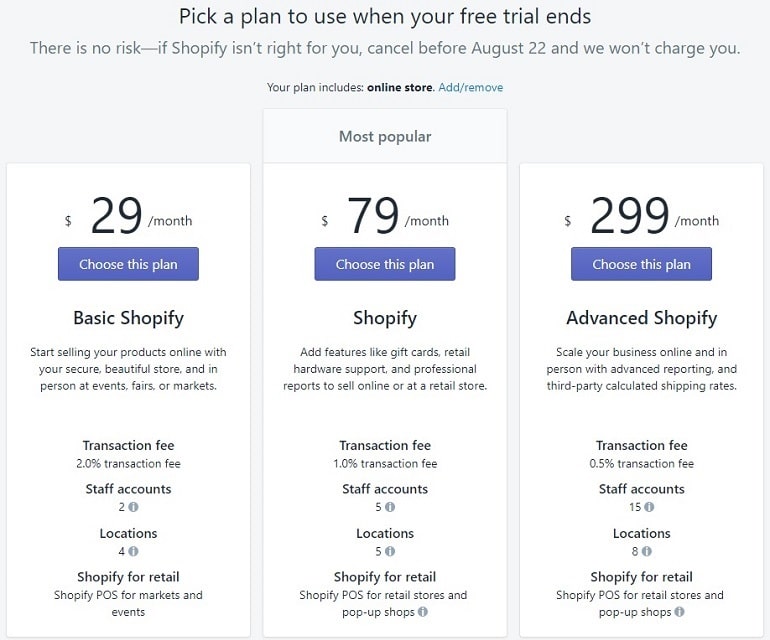
Shopify monthly plans start with $29 per month, for which sellers can sell unlimited products. The plan incurs a transaction fee of 2% for a basic Shopify account.
The monthly plan can go up to $299 per month. It provides gift cards, advanced reporting, and third-party calculated shipping rates to sellers.
Along with monthly plans, they have Shopify Gold and Shopify Lite. The Shopify Gold offers enterprise-grade solutions for high volume merchants and large businesses.
Whereas Shopify Lite helps merchant sell on Facebook and chat with customers on Messenger. Additionally, merchants can also add products to any website or blog and accept credit card payments for only $9 per month.
My suggestion is – start with the basic plan. As your store grows, move up the plans.
Look and Feel of Your Store – Themes
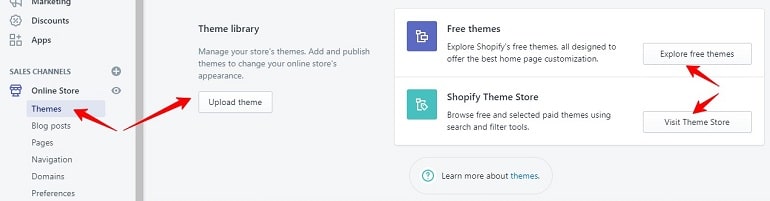
Navigate to the dashboard left panel and click themes under online store. A seller can either upload a custom theme or explore from the free or paid themes available.
Let’s explore the free themes to start with.
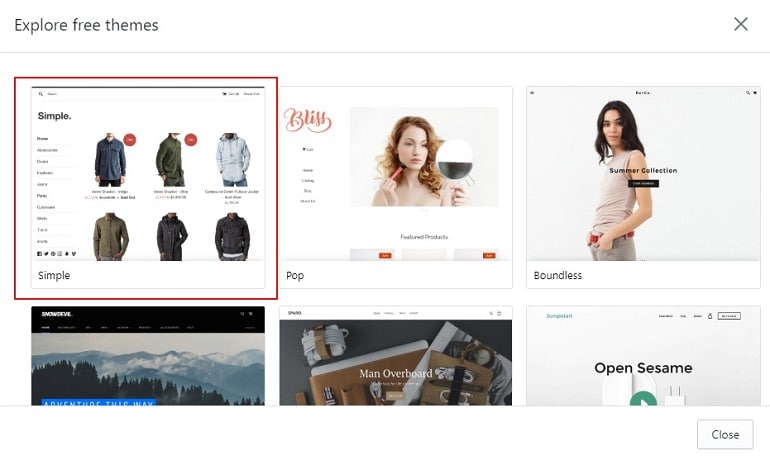
After installing the theme, one can customize it with logo, header, footer, and navigation menu.
Selecting the theme is as simple as a click. Choose the theme, and your store will change accordingly.
If you want to opt for a paid theme, you can either use from the one available on Shopify theme library, or can even use third party sites like ThemeForest to buy a Shopify theme.
Add Important Pages To Shopify Store
The store is getting its shape, and so we now need to add a few pages. The two essential pages apart form your store’s home page will be the about and contact pages.
Go to the left panel and click pages under online store. Now click add pages. The following screen will show up.

Create all such pages like about us, contact, terms and conditions, privacy policy, shipping charges details, return and refund policy, and FAQs, etc.
Here is my guide to help you write about us page.
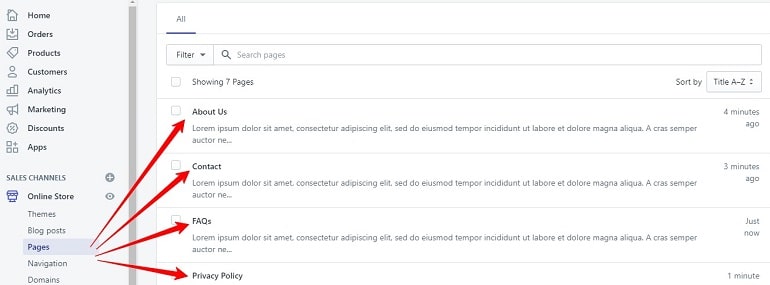
All key pages will reflect on the dashboard. Edit or delete pages using insanely easy to use page editor.
Creating Contact Page
Every Shopify theme has a built-in contact form. Creating a contact page is easy. Just change the page template to page.contact. Doing this will add a contact form to your contact page.
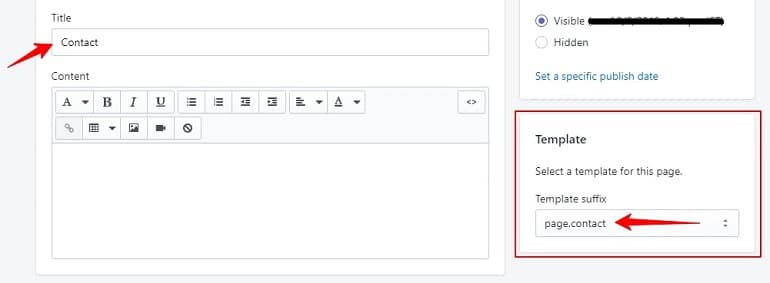
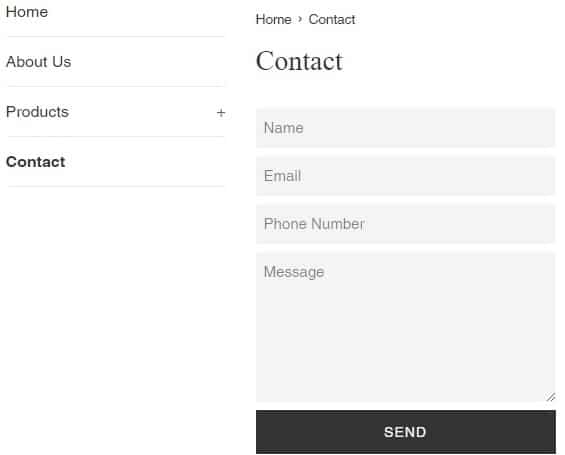
Once done, click save and click view page eye button. It will look exactly like the below example.
Add Your First Product
It is time to start adding products you wish to start selling.
Navigate to dashboard and click all products under products. Now click add products.
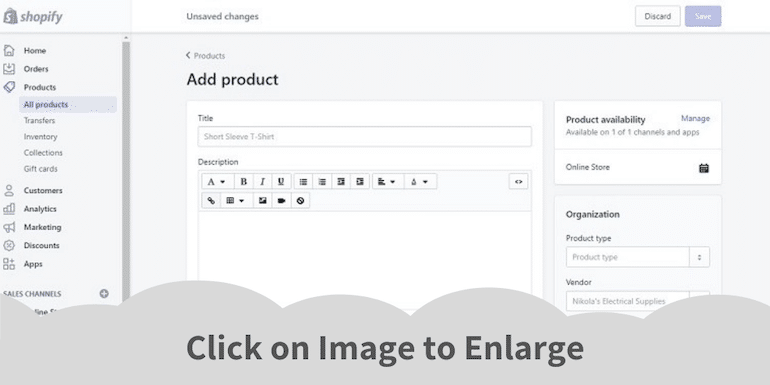
The Add product page is long. So I will explain each section in parts.

Title and Description
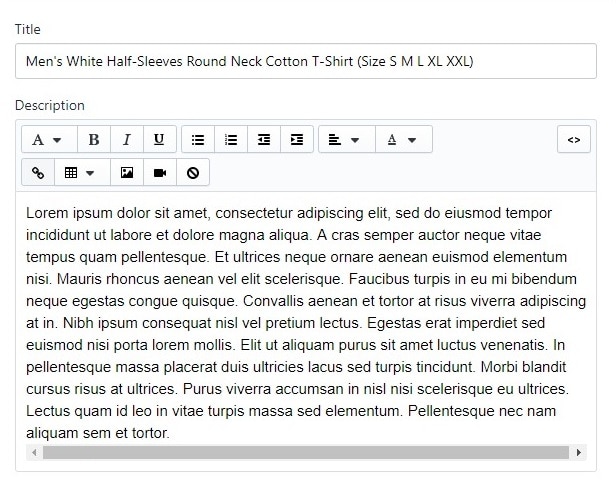
Add product title and product description. Provide as much information as possible in the description. It helps in making more sales and in search terms as well.
Compelling product titles and descriptions can significantly impact sales big time. Refer my article on how to optimize title and description to generate more sales.
Product Images
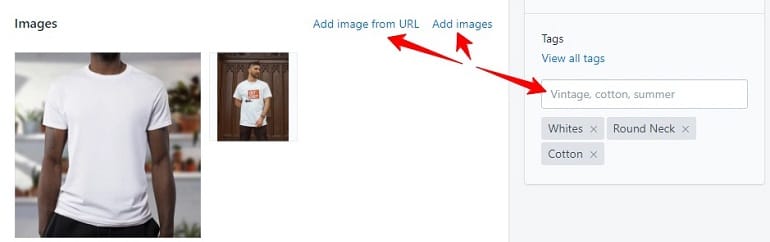
Enticing product photos can make more sales. Images speak a thousand words. They directly converse with the customer. A great photo is vital to convincing a customer to buy. The bottom line is to create and select product images carefully.
Sellers can hassle-free upload product images using the product listing widget. Refer to the above image. Moreover, they can add tags relevant to the product.
Pricing
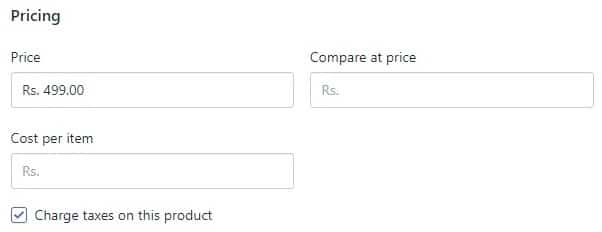
Enter the product price of the product.
Inventory

Define an SKU for a product. SKU is a stock keeping unit, which is a unique alphanumerical number for the product for identification.
If you have a barcode for the product, enter the same in the barcode field.
Select inventory policy as Shopify tracks this product’s inventory. Finally, the seller needs to enter the number of products available with him/her. It is the total number of units a seller has in stock and is offering for sales.
You can even enable the checkbox to allow customers to purchase this product when it’s out of stock for pre-ordering.
Shipping
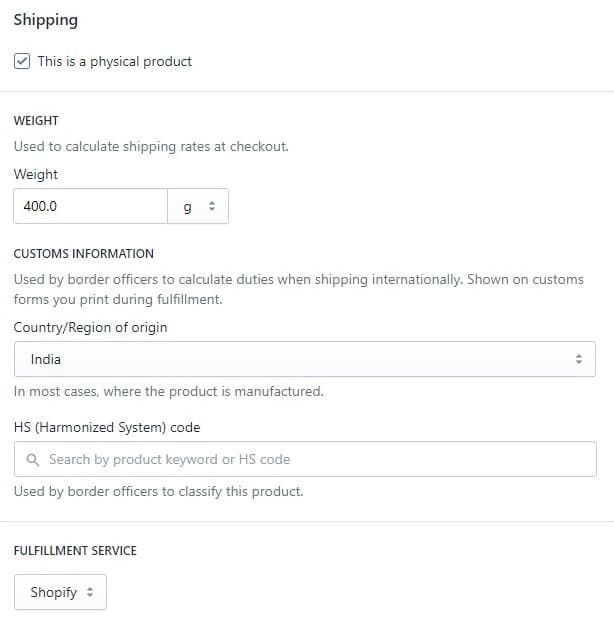
Naturally, the physical product will have its weight and dimensions. Enter the weight and relevant info.
The fulfillment service will be default as Shopify.
It reminds me of the Amazon FBA program where Amazon does pick, pack, and delivery.
Variants
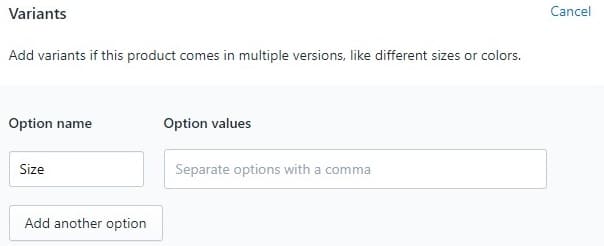
Adding a product variant allows the customer to see the available size and color of a product. Sellers can add another option (for example, fabrics) to show additional info about the product to the customers.
Once all the product info is in the right place, hit the save button. Repeat the same process for each product.
How to Add Products in Bulk?
There are two ways a seller can add products to his/her store. First, use the add product feature to upload products one-by-one. Second is upload products in bulk using excel sheet.
Let’s add product via Excel file in CSV format.
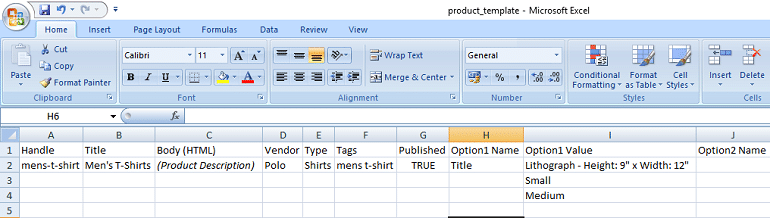
Download Sample CSV Excel File
Adding bulk products using an excel file template is termed as import products in Shopify. To do this, one can use a CSV (comma-separated values) file. It’s a file format (.csv) for spreadsheets.
Using a CSV file, a seller can upload a large number of products and their details in one shot.
Let’s see how an excel/CSV file looks.
Here’s a link to download sample product CSV file or can download directly from Shopify Help Manual.
Each field is explained in the official Shopify help manual here. I will skip copying the same here.
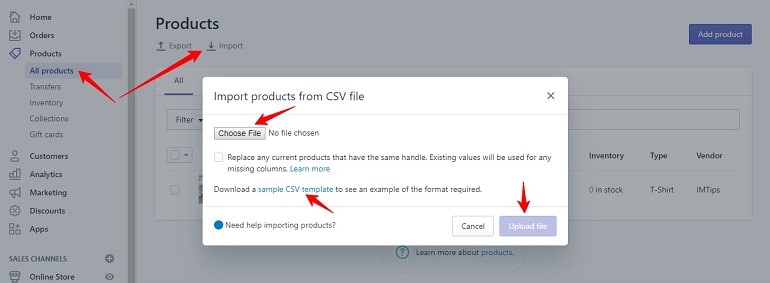
Upload and Import the CSV File
Navigate to the seller dashboard and click all products under products. Now click the import option. Upon doing this, a window will appear asking to choose the CSV file. Select the CSV file and click upload file. Refer to the image below.
For instance, I did a sample uploading with three products. I filled in all the relevant details in the CSV file and uploaded it using the import function.
What happened next is I rendered three new products in my Shopify store. Take a look at the excel sheet first.

Now let’s see how product portfolio enriches with three new products. Refer to the image below.
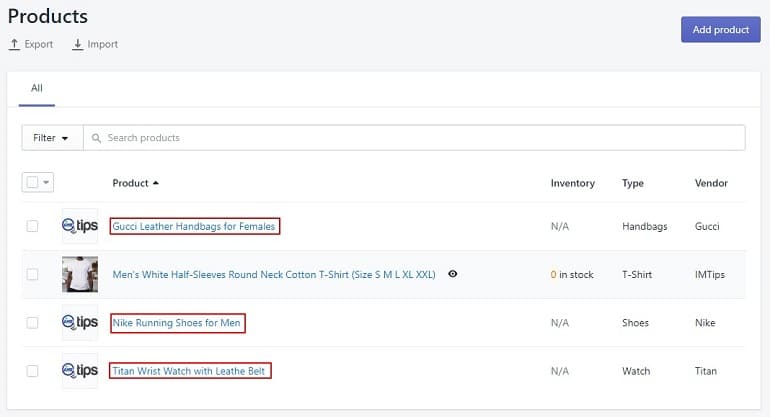
If you look closely, there are no product images. It’s because I didn’t purposely insert image URLs in the excel file. Although, that’s how anyone should be doing it.
The excel file allows users to insert images URLs which are imported and uploaded to your store.
How to Upload Product Image in Bulk?
To insert an image URL in the excel file, we first need to upload the image somewhere. Then we can copy the URL and paste them into the excel file.
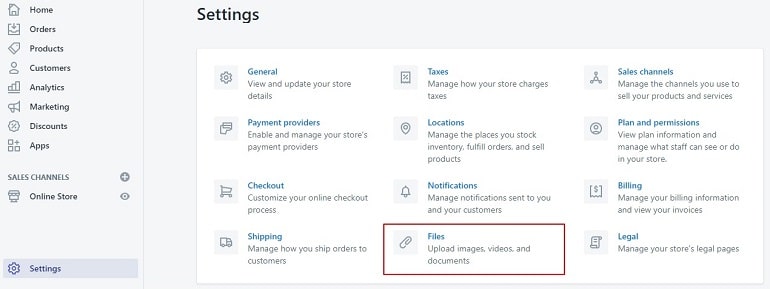
To do this navigate to the dashboard and click settings. It’s at the bottom left corner. Now locate the files option.
Upon doing so, the following screen will appear. Click upload files and select images that need to upload.
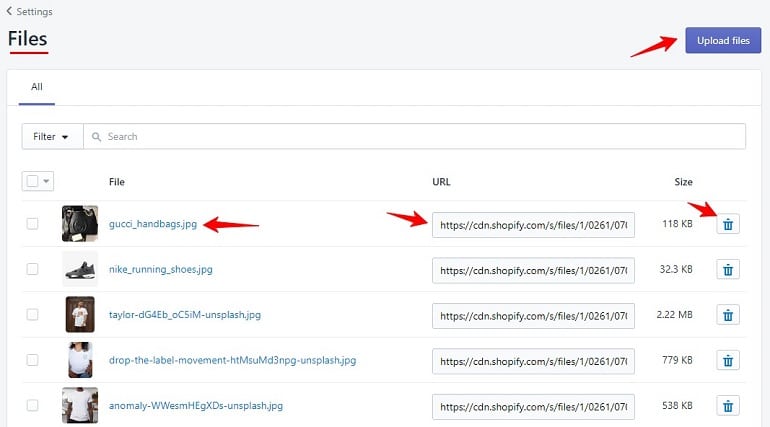
Here, one can upload product images beforehand and mention the image url in the CSV file.
Final Thoughts
In this article, I have covered all the necessary steps required to set up a Shopify store. It is an initial set up. Still, there is a list of things yet to be completed.
For example, connecting the store to a domain name, setting payment gateways, configuring shipping, menu, and navigation, etc.
And if you are looking to make more sales, consider Amazon India as well. Here are some of the articles to start selling on Amazon India: