How to configure shipping settings for a Shopify store? Set pickup locations, fulfillment priorities, shipping zones, packages, print packing slips, etc
After payment gateways, Configuring shipping is the next important step in setting up a Shopify store. The best part of hosting an eCommerce store on Shopify is – they allow shipping configuration within the Shopify interface. Unlike WooCommerce, where you have to test third-party shipping service providers.
So it is essential to configure the settings for shipping for your Shopify store. Additionally, we will also look into different shipping zones and their shipping rates.
Start With Shipping Settings for Shopify Store
Navigate to the admin area and click Settings on the left panel. Further, click shipping in the pop-up window. The below screen will appear.
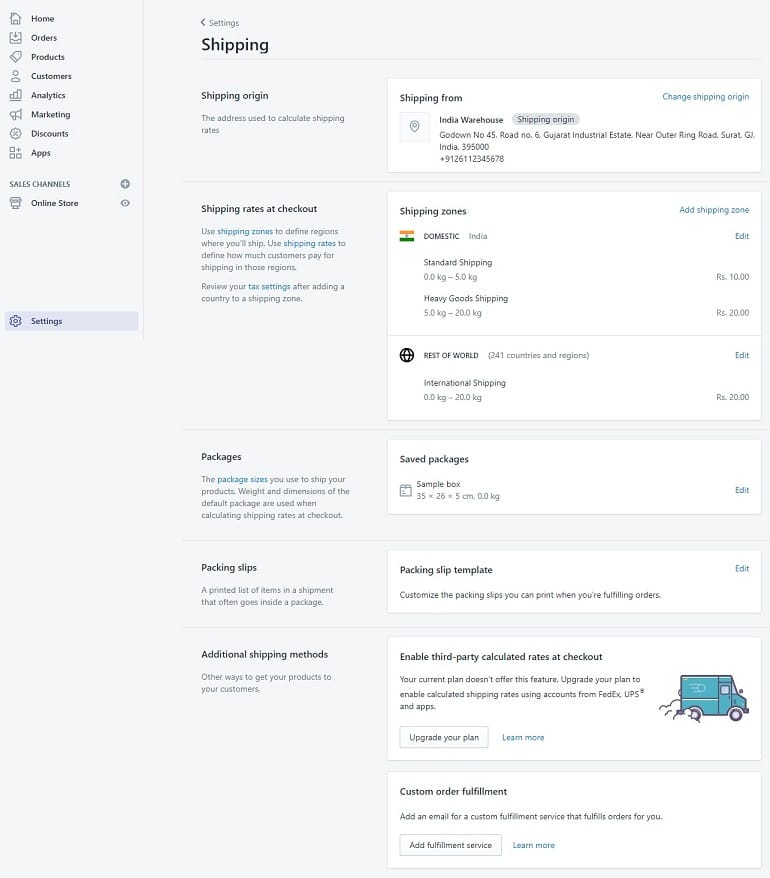
Under the shipping options, a seller needs to set five essential functions. I have listed them below. We will be learning each one of them in detail as we proceed further.
- The shipping origin address
- Shipping rates at checkout
- Package size
- Print packing slips
- Additional shipping methods
Shipping Origin

It’s a physical location where sellers either sell products, ship or fulfill orders, or stock their inventory. In short, first, a seller needs to set up a location. This location will reflect here in the shipping origin widget.
If a seller doesn’t set a location, the system will display the credit card address as the default location. The one which is used to subscribe Shopify monthly plan.
Set Pickup Locations
A seller can set up multiple locations in his/her Shopify store. However, a location can be a seller’s retail store or a warehouse. It can also be some other place where a seller decides to manage or stock inventory.
Shipping in Shopify allows multiple locations depending on the monthly plan. For example, the basic Shopify plan allows 4 locations. Whereas the advanced Shopify plan offers 8 locations. I have listed the number of locations other plans offer:
- The Shopify Lite – 3
- Shopify – 5
- Shopify Plus – 20
To set the desired location, click location under settings on the left panel. The following screen will appear.
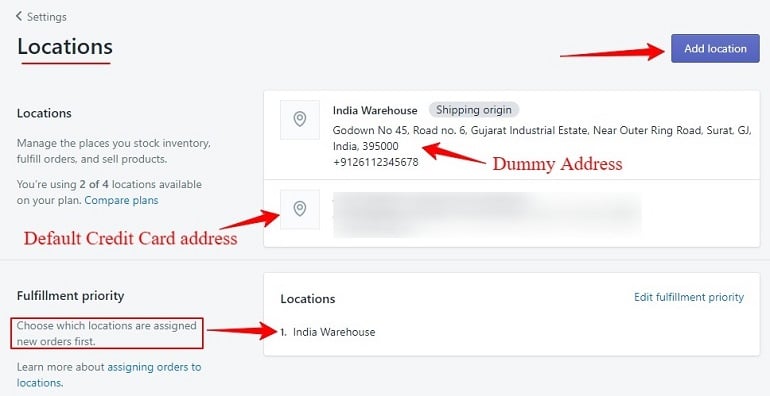
The above example shows two locations. First is a dummy address I have created for understanding purpose. The second one is my default credit card address. To add a new location, click add location button.
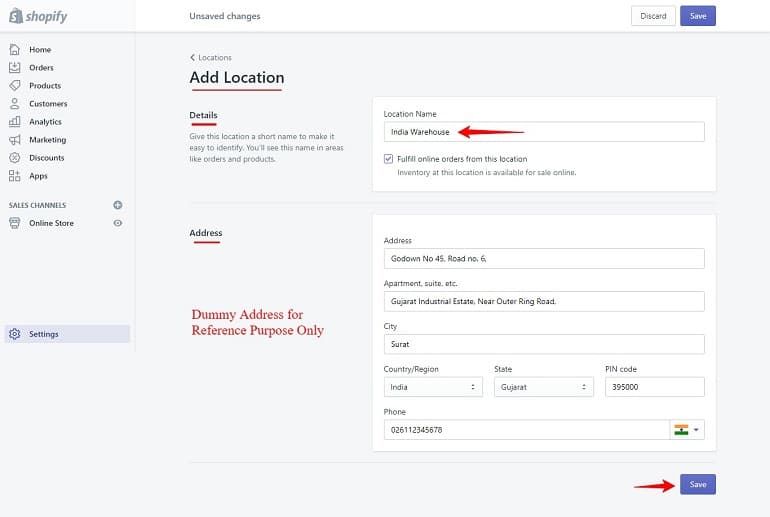
Here, the seller will have to name the location so that it’s easy to identify. The location name will reflect on the order and product detail pages. Click save once it is done.
Edit Locations
The system allows easy editing too. Users can click on the desired location, which needs to be edited. Refer to the image below.
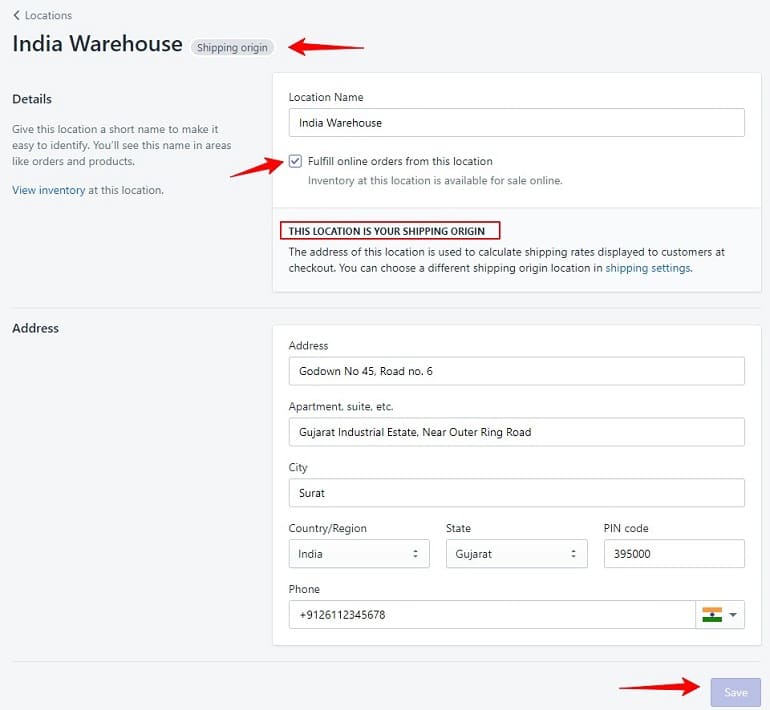
Here user can edit the details and address fields. If sellers decide to shift the fulfillment location to some other place they can do here, tick the checkbox Fulfill online orders from this location under the location name.
Additionally, this address will be the shipping origin address. All the shipping rates will be calculated based on this address.
Fulfillment Priority
The fulfillment priority for Shopify Shipping defines from where the orders will be shipped first. It is a useful feature for sellers having more than one location.
A seller can decide to ship fresh orders from location A. If there are any returns, the seller may ship second time from location B. A seller can choose to stock the inventory to an altogether new location C.
In that case, fulfillment priority plays an important role. Doing this a seller tells the system from where the pick will be done if there’s a new order.
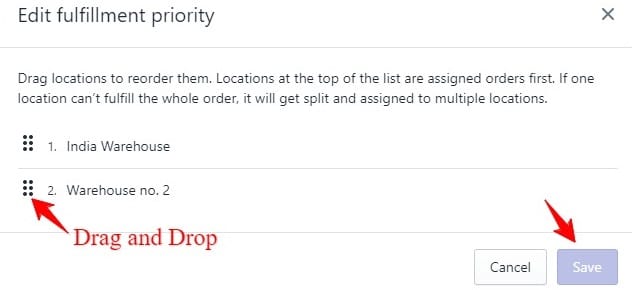
To assign location priority click the edit button. It’s an easy drag and drop. The top location will be designated as the priority location. Refer to the below image.
Shipping Rates
Now we will add the shipping price a customer needs to pay for shipping.
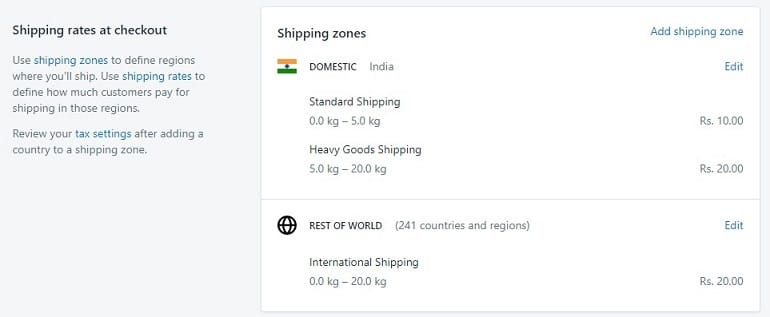
The shipping amount is calculated on the shipping zones and rates applicable in that zone.
A shipping zone is a region or country where a seller will ship the order.
For instance, I have set two shipping zones viz Domestic and Rest of World. In the above example, my shipping rates are based on weight. Besides, one can set rates based on sale price also.
However, it is applicable for all the shipping zones defined by a seller. Now, let’s see how to add a shipping zone.
Add a Shipping Zone
Let’s understand adding shipping zone with Asia as an example.
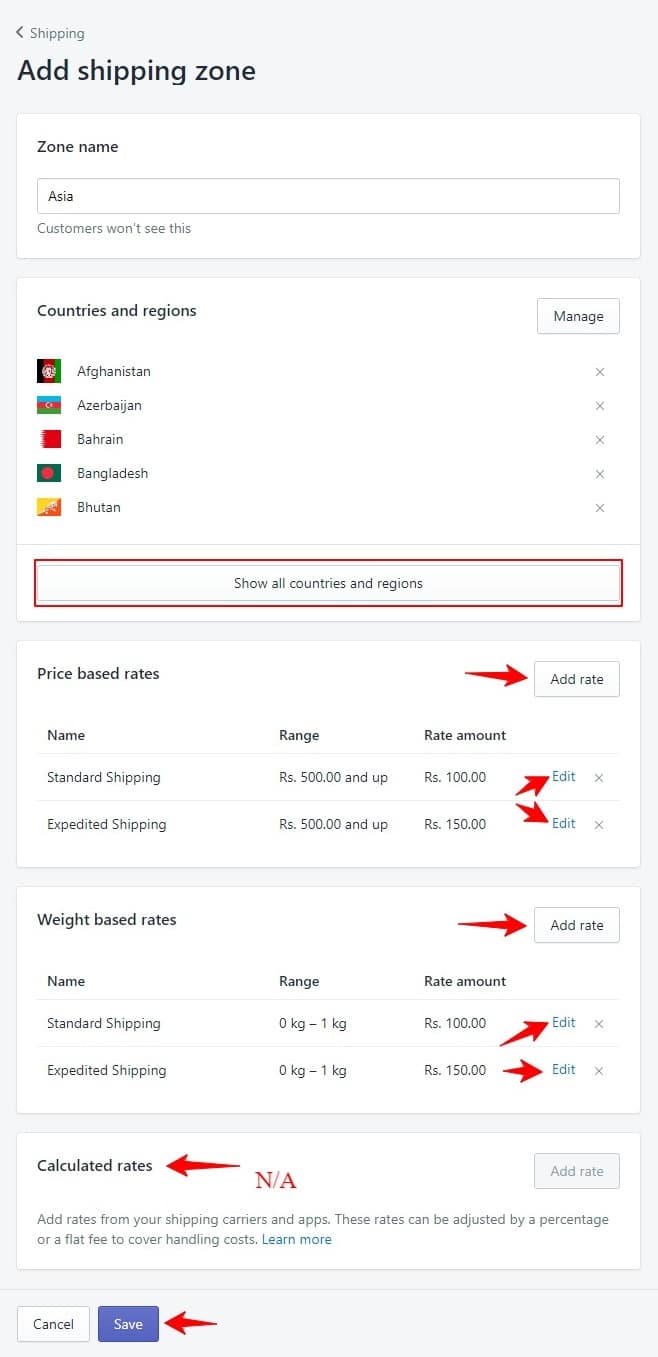
- Zone Name – First thing first, define the zone name. For example, Asia, USA, Europe, etc. refer to the image above.
- Countries and Regions – The countries and regions are segmented continent wise. For example, if a seller selects Asia, all Asian countries will fall under the Asia zone. To select click manage to see all countries and regions button will render the full list.
- Price Based Rates – Here, sellers can configure shipping rates based on product price range. For example, a seller can charge Rs.100 for an order amount of Rs.500 and above. Click add rate to add new and edit to make changes in the existing one.
- Weight Based Rates – Alike price, sellers can charge shipping rates based on product weight too. For example, Rs.100 for 0 kg to 1 kg and so on. Click add rate to add new and edit to make changes in the existing one.
- Calculate Rates – This option is active in higher subscription plans only.
Finally, click save and return on the admin panel to see the effects.
Define Packaging

Packages are necessary while fulfilling an order. Shopify sellers can save package types in admin panel using a simple widget.
The shipping settings page or the order fulfillment page are two places where a seller can save packages.
Editing Packages
In the Shopify shipping, settings click the edit button in the packages widget. The following window will popup. Name the package type and add a convenient package dimension (LxBxH). Sellers can also add empty package weight.
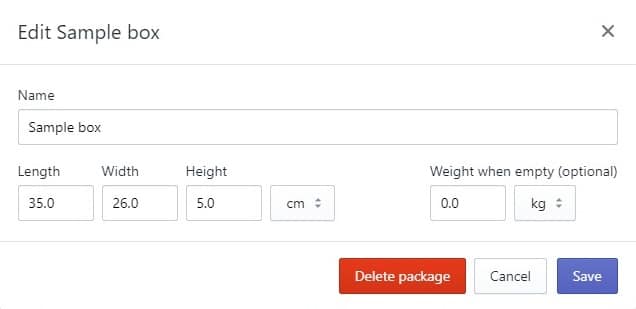
Most shipping carriers charge by size and weight. Hence it is essential to define the package dimensions precisely.
When a seller enters perfect dimensions and weights of packages, the calculated shipping rates will be accurate. This way, sellers can reduce unwanted shipping expenses as well.
Packing Slips

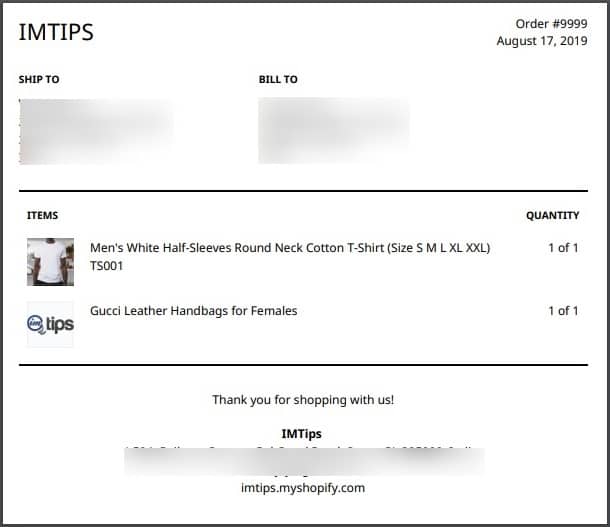
A packing slip is a list of items in a shipment which is placed inside the package. It tells the customer what is included in the package.
Editing Packing Slips
The packing slip in Shopify is created using a template language Liquid. These slips are editable. Sellers can edit the packing slip template provided they know HTML, CSS, and Liquid programming languages.
If not, then consider taking help of a web developer. To edit the packing slip template click edit. Refer to the image below.
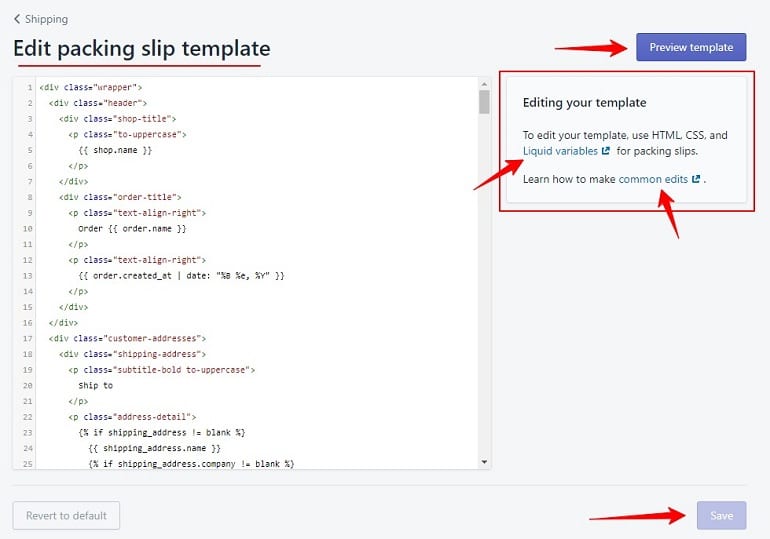
As discussed above seller can edit the template.
If you aren’t sure about the HTML, get someone who knows HTML to design your packaging slip.
Template Preview
