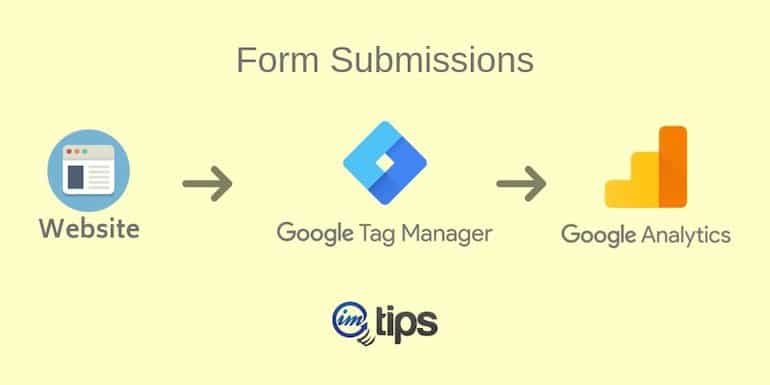
The step by step guide creating the trigger and tag to track form submissions on any particular page of a website or a blog via Google Tag Manager.

Tracking form submission on a website or a blog is popular among marketers. It can reveal a lot about the forms you have on a site to convert users into members and in the long-run into customers.
In this article, I will create a tag for tracking form submission via Google Tag Manager. I will use my blog’s homepage form.
Refer to the image below.

So, let’s get down configuring tags to track forms.
Step 0: Pre-requisites
You should be aware of Google Tag Manager Lingo. Moreover understand what a trigger, tag, and the built-in variables available are.
The next is, you should have a Google Tag Manager for tracking site’s traffic in Google Analytics though it isn’t a must. We will still need to have the Google Analytics Property ID to send scroll depth data to Google Analytics.
If you aren’t sure, refer to my article – How to Connect Google Analytics With Google Tag Manager first and then continue with this article.
Step 1: Create Trigger

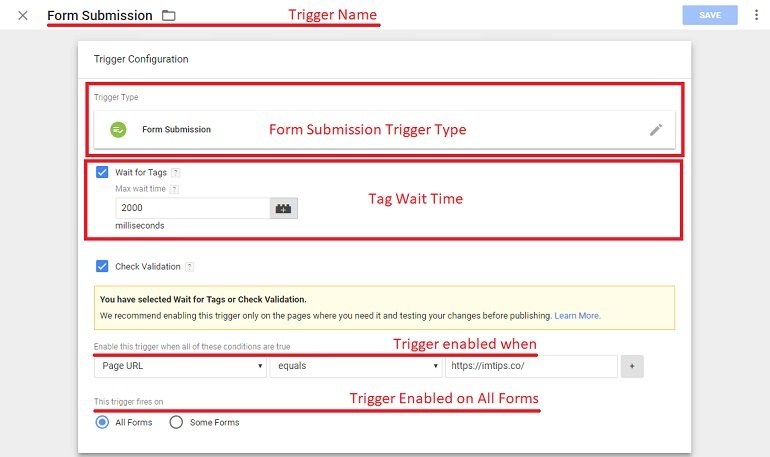
- Trigger name: Name the trigger with something meaningful. I have it as “Form Submission”.
- Trigger type: Select “Form Submission” from the pre-defined triggers.
- Wait for tags: Keep this to few seconds because the form submission should take some time for the user to fill the details and then click the submit button. Clicking the button at the time of page load shouldn’t fire the tag. I have kept it to 2000 milliseconds or 2 seconds which means it will track data only after 2 seconds of page load.
- Check Validation: Using “check validation” means the data submitted will be checked for validation before the tag fires.
Note: As we can see in the above screenshot, Wait for Tags and Check Validation being true, this can be a time-consuming process and so it is recommended to enable them only on the landing/contact pages where we have forms or on particular pages where this trigger is particularly needed.
So we define the exact page url of the page where we want to track form submission using
Page URL > equals > (URL of the page that has a form)
- Trigger fires when: All Forms. If you have multiple for on the particular page, you have to select the HTML form using the class or HTML form ID.
Step 2: Create a Tag

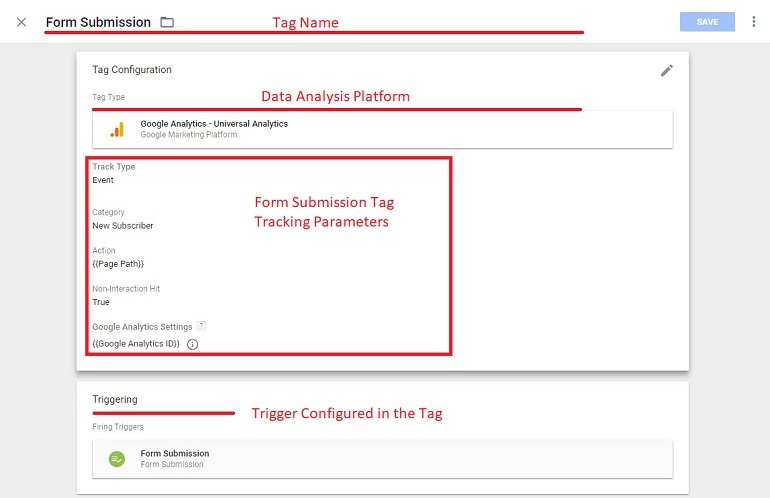
- Tag name: Anything that helps you identify the tag. I have it as Form Submission.
- Tag type: Google Analytics – Universal Analytics (We will pass the Form Submission data to Google Analytics).
Event Tracking Parameters
- Track type: Event (Selected from the drop-down menu list)
- Category: New Subscriber
- Action: {{Page Path}}
- Label: Leave blank
- Value: Leave blank
- Non-Interaction hit: False (Only if you want to make this tag reduce bounce rate, else set as true)
- Google analytics settings: {{Google Analytics ID}}
Preview the tag before making it live.
Track Your Tag in Google Analytics
Log in to your Google Analytics account and locate the Affiliate Link Clicks event under Behavior > Events > Overview. Look for the category that we assigned in step 2 which is New Subscriber. It will show the form submission data.
Note: Do not try to send user data (name/email) to Google Analytics for privacy.
Check out affiliate link clicks, external link clicks, page scroll depth and google ads conversion using the Google tag manager.
