Understand the basics of Google tag Manager and how to connect with Google Analytics such that you don’t need to use Google Analytics code on your website.
What is Google Tag Manager?
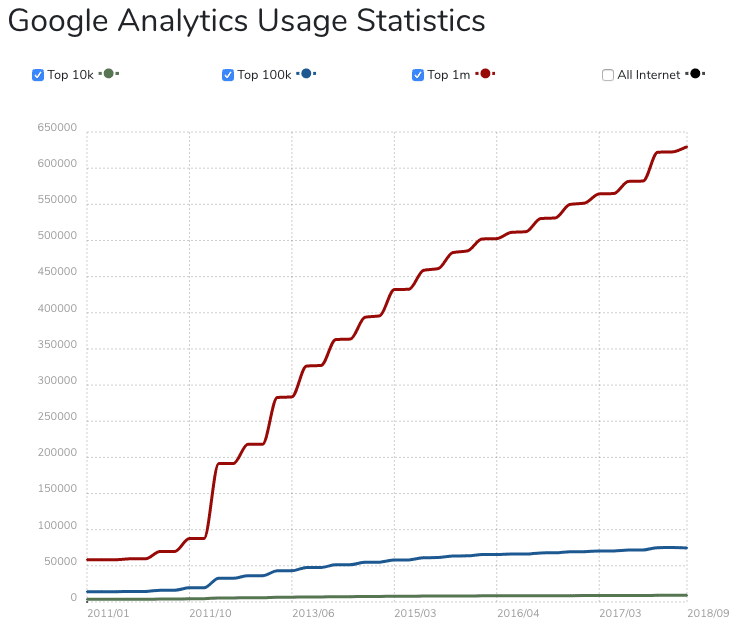
Everyone uses Google Analytics. If we go about by the builtwith.com data, almost 65% of the top million sites use Google Analytics. The percentage increases to over 76% when we only consider the top 100k sites, and it reaches a whopping 93% out of the top 10k sites.
So when you use Google Analytics, one can track many events for better stats and reporting. As an example, what is the average page scroll for the user, and how many pages user visits from individual entry pages?
Instead of writing code for tracking each such event, one can use Google Tag Manager.
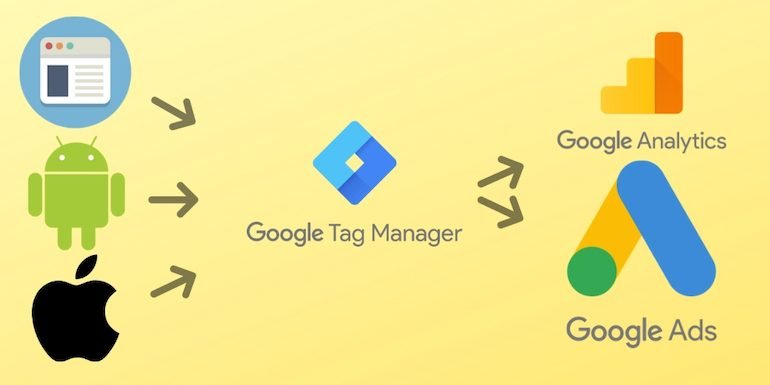
For instance, you can create a tag that will tell you how many visitors have read a particular blog or say how in-depth they scrolled to read it. Google Tags will send relevant information on an exact activity to Google Analytics or Google Adwords or any other third party tools.
Google Tag Manager makes the tagging way easier without a need to write code for events or triggers. Copy and paste tagging codes once for a website and use Google’s tag manager UI to track events and fire triggers.
So any non-technical user can also use it to track events.
Though basic knowledge of HTML and CSS can help you create better tracking events and triggers. As an example, if you wish to track multiple forms on a page separately, you need to able to select the right selector CSS class name for it.
One key point one should note is, Google’s Tag Manager interface is only to create tags for a given activity you want to track. It doesn’t generate any kind of reports. For reporting purposes, one has to use Google Analytics or even can pass the data to Google Adwords.
The Advantage of Google Tag Manager
Google Tag Manager is a Google product and is free.
- Eliminates the heavy lifting of writing code for each event you want to track
- Automatically codes for you which is bug-free
- It is much of a user based tool compared to a web developers tool.
- You can quickly add and edit tags on your own and integrate them with multiple third-party tools.
- You can generate tags to track specific activities for a website to increase ROI
- Easy enough for non-programmers to start with
- Manage mobile apps
- High-quality reports with any third party tool or Google Analytics
How to Add Google Tag Manager
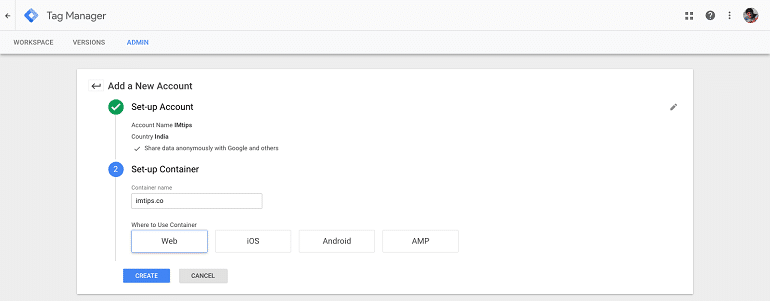
Sign in to Tag Manager. Do input your account name, country, website URL, and select the container – Web, iOS, Android, or an AMP website. Click create.
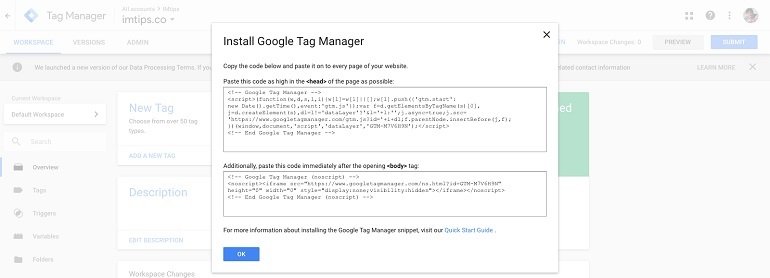
The next step is to install the given codes on your website HTML. One code shall be installed in the <head> & the other one after the opening <body> tag. When done, click ok. If you are using a WordPress website, you can install the Google Tag Manager WP Plugin and add the code by just adding your property ID.
You will be able to capture data, analyze reports & monitor your tags provided the code is installed.
After the initial setup, it’s time to get along with the interface atmos, features, and navigation for easy understanding and smooth functioning.
Also, this is the only code that you need to deploy on every page of the website. Now one can use the tag manager to send the page view data to Google Analytics.
Google Tag Manager Dashboard
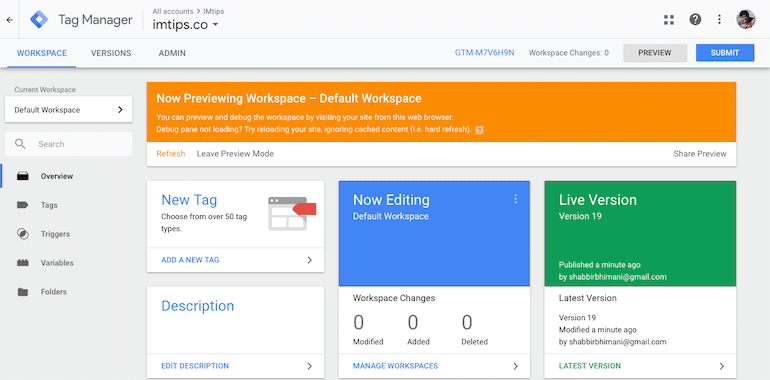
GTM presents a dashboard with navigation links in the left panel.
We have the Container Name – biztips.co right at the top. We have an alphanumeric ID GTM-XXXX as the GTM ID. Clicking the ID will retrieve us the GTM code for your container.
The Preview and Submit buttons help in previewing our charges and make changes live, respectively. Preview enables you to monitor how your tags are working on a live website using the tag manager console window, as shown below.

Components of Google Tag Manager
1. Container
As the name suggests, a Container holds all your tags in one place. The best practice is to create one container for one website and name the container the same as your website URL. Here, I have named my container as “biztips.co.”
The code we inserted on the website is the container code generated by GTM.
2. Triggers
Triggers are for an event based on the filters. Specific activity is an event (Scroll, Click …), and the condition that triggers the event can be filtered based on conditions.
For example, events can be a download e-book, click a linked or bought a product or remove items from the cart.
There must be a minimum of one trigger to fire a tag. When you click on the trigger option, GTM provides you with a list of possible events that can be triggered to fire different tags. See below.
List of Built-in Trigger Type
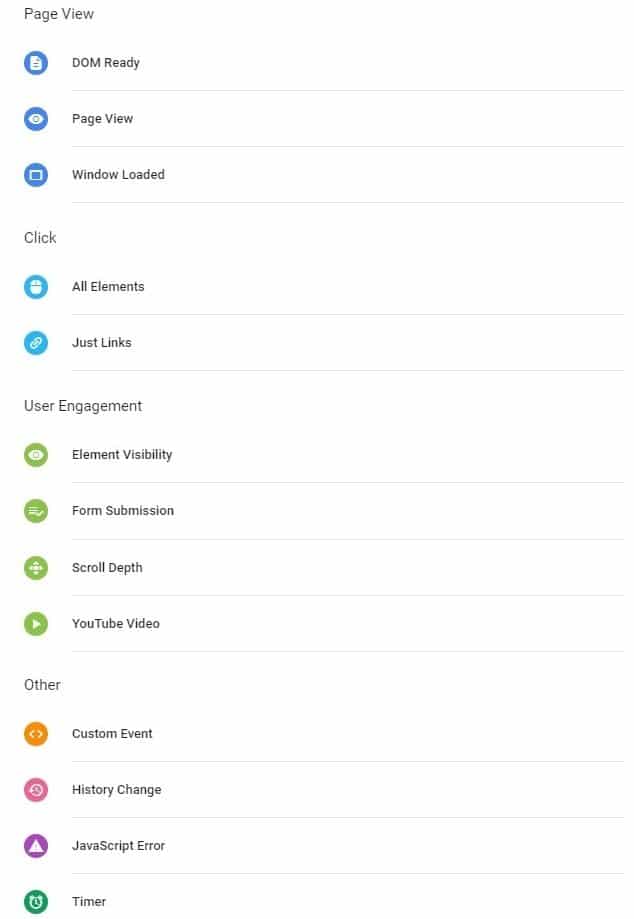
If you wish to understand the details of each trigger, refer to this official guide.
Understanding Events and Filters with an Example
![]()
Let’s say I want to track all external links click on my blog into Google Analytics.
I have created a Click – All Elements event to trigger as soon as a user clicks the link that isn’t on my blog domain biztips.co.
The event is “click,” and the trigger is based on the filter is those links that don’t have the biztips.co as the domain name.
Similarly, one can create any trigger based on conditions using CSS classes or HTML IDs. If you have more than one link that points to the same URI (multiple add to cart button or multiple buys now buttons) and wants to track which link is being clicked, you can specify the HTML ID or CSS class to trigger different events based on each element. It is where you need some knowledge of HTML / CSS to come in handy. A way to measure the Click Through Rate of each element on a page.
Once the trigger is created, create a tag to Google Analytics.
3. Variables
Google Tag Manager Variables are of 2 types – Built-in Variables are provided by the Google Tag Manager and User-defined Variables.
One can use built-in variables directly or can create a variable from the built-in ones. Creating a variable is seldom needed as Google Tag Manager has provided much of the required variables.
Create Tag to Connect Google Analytics
We have a basic understanding of the tag manager lingoes. So now, let us use the tag manager to track page views in Google Analytics and replace the code of Google Analytics with that of the tag manager.
Click Tags on the left panel on the dashboard and click the New tag Button. You will see the Tag Configuration and Triggering options.
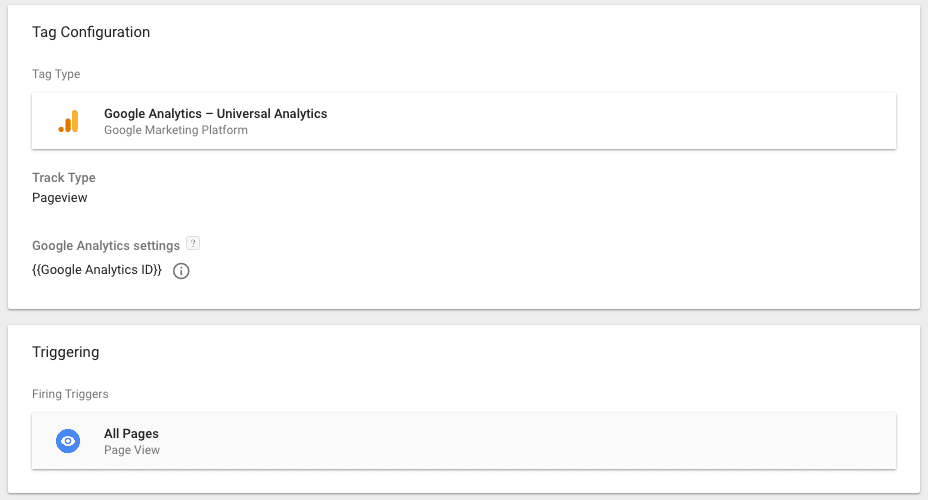
Select Google Analytics – Universal Analytics for the Tag Configuration and for Triggering set it for “all pages.”
Integrating Google Analytics for the first time, you will need to set the Google Analytics Property ID.
Click the drop-down list in “Google Analytics Settings” Under New Variable option and add your Google Analytics Property ID which you will have from the Google Analytics dashboard and is of the form UA-XXXXXX-XX
Save the tag.
It is now ready to go live.
After creating tags, you need to publish them. Before publishing the tag, you can preview it and check whether it is working fine or not on your website.
On the dashboard, click Preview. An orange strip appears that tells you that you are in a preview mode now. You can preview and debug the workspace by visiting your website. See the images below.

Debug Pane at the bottom of biztips.co website. The debug window helps you analyze potential errors in the tag. This window is visible only to the tag creator and not to the users.
The debug window shows all the information about the tags, triggers, and data layers. An event summary on the left side provides details on all the events that take place. Furthermore, the events also show the tags that you have programmed to fire, their triggers, and block triggers if any.
To close the debug window, go to the GTM dashboard and click Leave Preview Mode.
Google Tag Assistant – A Free Chrome Extension
The Google tag assistant is a free Chrome extension. It is helpful to perform a check whether or not your tags are firing correctly or if it needs editing. Below is the screenshot of the Google tag assistant that I have installed in my chrome browser.
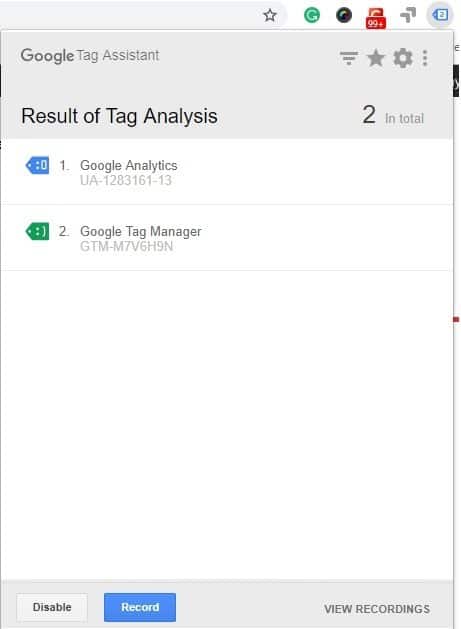
The Google tag assistant uses a Green, Blue & Red color system to indicate the health of your tags. Green means all of your tags are working, blue means GTA has suggestions to improve a tag, and red means it’s not working.
Check all your tags using GTA, and when it appears that all tags are firing correctly, you can go ahead and publish them. Hit the Submit button in the upper right corner on the GTM dashboard, enter a name and description for the new container version, and publish it.
Every time you make a new tag, trigger, variable, filter, or any small change in the existing properties in GTM, it will ask to review the changes, save and publish them. This way, you will create new versions of your container every time you save.