How to add or embed Google Maps in WordPress Using a Plugin or directly via the Google Embed Code in Classic and Gutenberg Editor

Having Google maps on your contact page can help your customers locate you. WordPress allows you to add or embed Google Maps in posts and pages of your website.
In my earlier articles, I shared how to add Google Tag Manager, Google Adsense, and Google Analytics in WordPress. In this article, I will show you how you can add or embed Google Maps to any page or post of WordPress.
There are two methods to add or embed Google Maps in WordPress.
- Manually (In the classic Editor as well as using Gutenberg)
- Using a Plugin
Let’s see both of them one-by-one.
Manually Add Google Maps in WordPress
Browse the Google Maps site. Here type full address of the location along with Pincode in the search bar. The address must be accurate so that the user gets precise location details.
Google will display your location on the map. Refer to the image below.
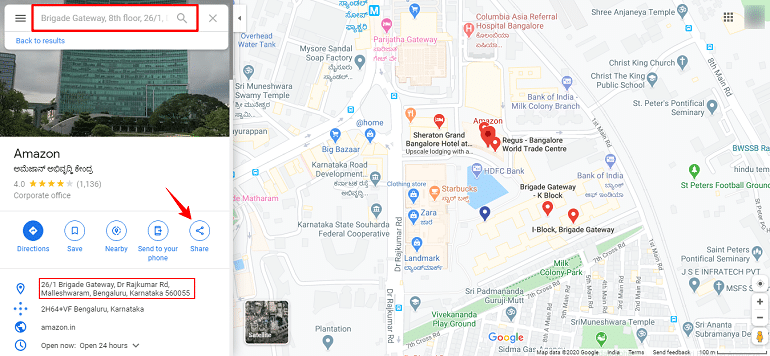
For easy understanding, I have taken Amazon India Head office location of Bengaluru, India. Click on the Share button on the left panel. A popup will open up on the main screen.
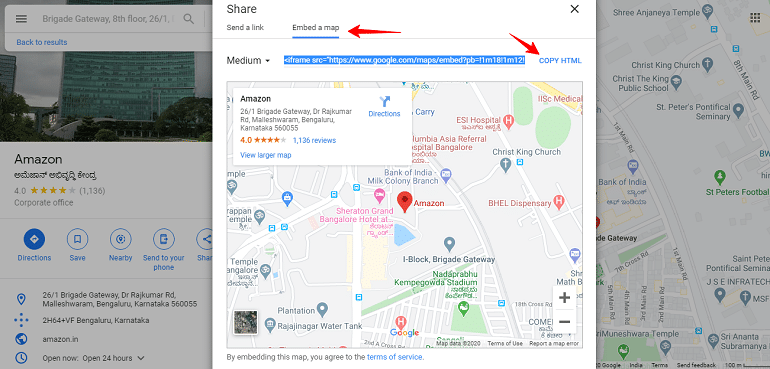
Click on embed a map option. It will show you the embed code. Copy the iframe code or click on the copy HTML link. Copy the Google Map iframe code.
Now go to your WordPress post or page where you want to embed the Google maps.
WordPress has two editors viz Classic and Guttenberg. Hence, I will be showing how to add Google Maps in both the editors.
Embed Google Maps in WordPress Classic Editor
If you are using the Classic editor in WordPress, then paste the code in the text tab. See the below image.

Now click the visual tab in the WordPress editor to see the embedded map. Besides, you can copy or paste the HTML code anywhere in the classic editor to display the map. Save your post or page and preview the Google map.
Embed Google Maps in WordPress Guttenberg Editor
Guttenberg is the latest WordPress editor. All you have to do is select an appropriate block for a specific task.
For example, adding images would require adding an image block first. Likewise, you will need to add a custom HTML block and then paste the iframe code in it.
Refer to the image below:
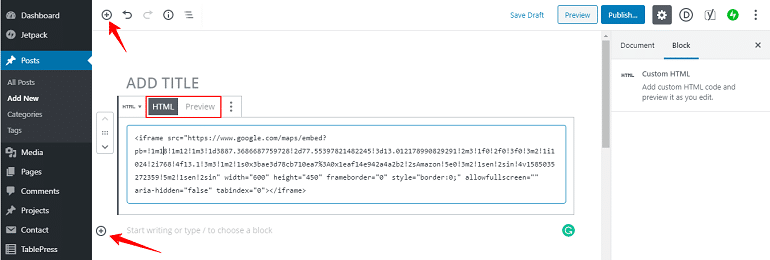
To add a custom HTML code block, click the “+” sign. Click formatting and select custom HTML block.
Now paste the code in the HTML tab, as shown in the example image above. The preview button will show the visual map. Once you are done save as draft, publish or update the WordPress post or page.
One can add more than one Google Maps on a page by adding the code for each embed. Now let’s see how it is done using a plugin.
Embed Google Maps in WordPress Via a Plugin
If you don’t want to be adding multiple maps, the embed option is the preferred choice. However, there are many plugins for embedding Google maps in WordPress, but the best of all is the MapPress Google Maps plugin.
Install the plugin to be able to embed Google maps in WordPress.
MapPress Settings
Select Google as the map engine and add the required API key. You can find the step by step guide by Google to getting an API Key on Google cloud here. Beyond a specific limit, the loading of maps is chargeable. If you don’t wish to pay, you can continue using the leaflet API.
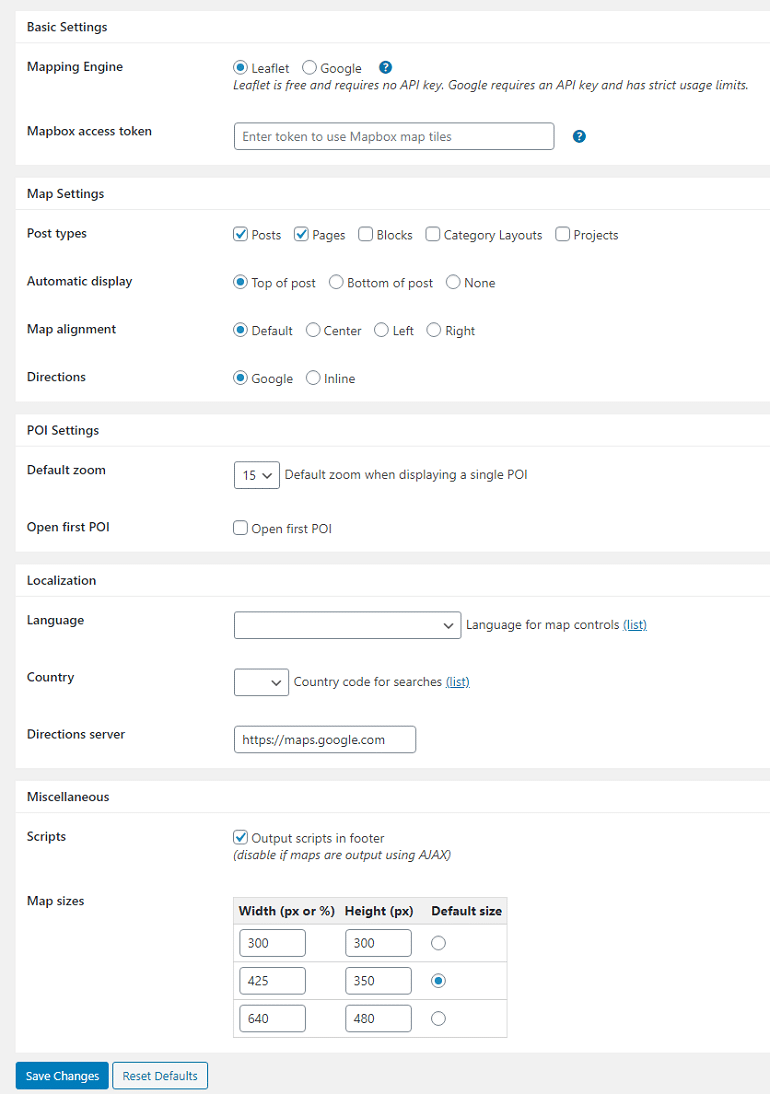
Once you are done configuring the plugin, head over to post or page editor, embed the maps, as shown in the image below.
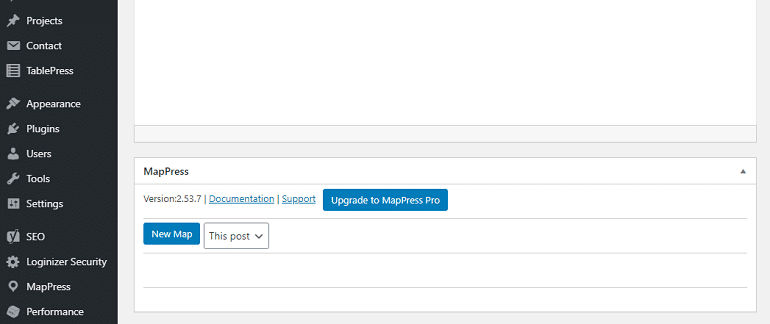
Click on the New Map button. Give a suitable title to your map. Select the display size from the set of preconfigured sizes. Besides, you can insert your custom map sizes too.
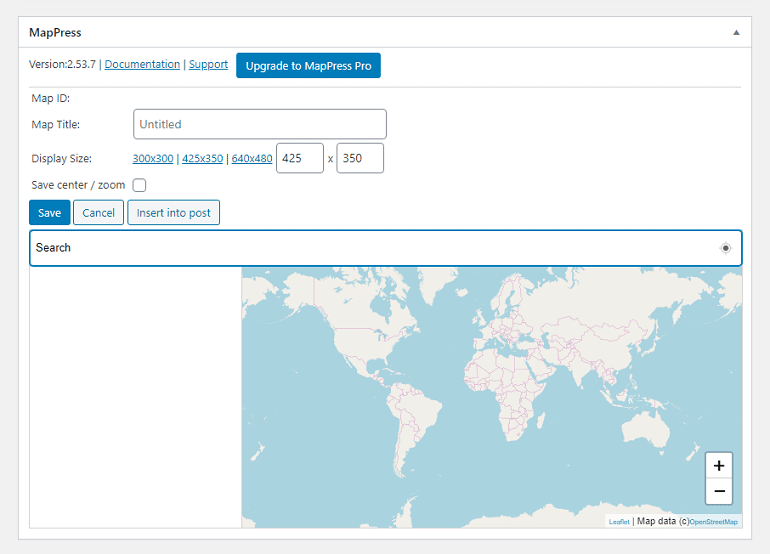
Now enter the address in the search bar that you want to display in your post or page. Once you verify that address is what you want it to be, hit the save button.
To insert the saved map click insert into post button. Update your post or page and see the preview.
