Do you want to track users who subscribe to your AWeber list as conversions in Google Analytics? Here is my step by step guide to help you

Tracking conversion is an essential aspect of any online business. A webmaster needs to track conversion because tracking helps webmasters in understanding what’s working and what isn’t. So let share how to track conversions with Google Analytics goals with AWeber.
If you aren’t sure about AWeber, checkout my AWeber Review.
So without much of an ado now let us begin.
1. Configure AWeber to redirect User to Thank You Page
When people subscribe, you redirect them to a “thank you” page. Most autoresponders offer default “Thank You” page, but to track conversions, you will need to create your thank you page on your site.
Once you have the “thank you” page, you can set the URL of your “Thank You” page in Aweber
Aweber provides a couple of types of thank you pages which you can use for tracking conversions:
- When a user subscribes to the list using a web form.
- When the user confirms the subscription to your list. (Assuming double opt-in is enabled)
So let us look into each option.
Option 1: Use AWeber Form Submission
I do not prefer tracking the web form submissions, but just in case you want, you can do it as follows.
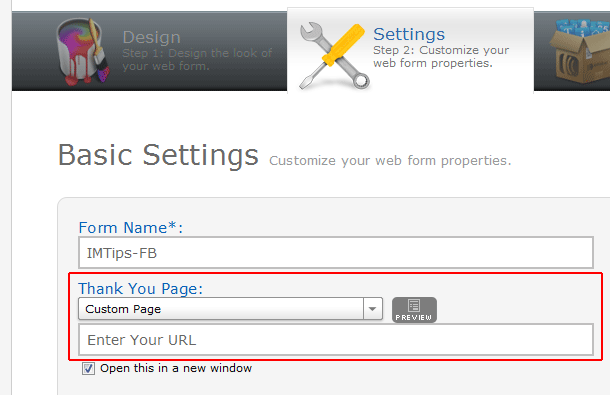
- Log in to your AWeber account and go to Webforms, and select the form you’d like to track for submissions.
- Click the Settings tab at the top, and you will see an option that says “Thank you page.” Select the custom page option and enter the URL of your “thank you” page we just created above.

The form submission doesn’t provide much value unless you only have single opt-in where the user doesn’t require to confirm his or her email.
Option 2. Use AWeber Confirmation Success Page
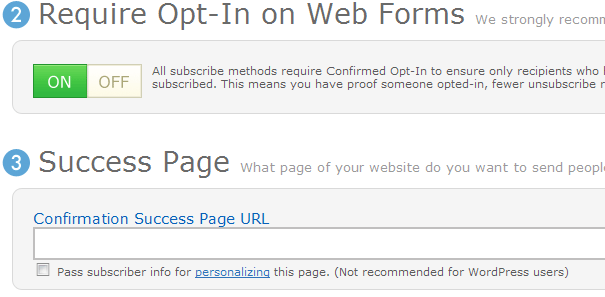
- Log in to your AWeber account and go to List Settings.
- Click Confirmed Opt-In tab at the top, and you will see an option that says “Success page.” Enter your URL of the “thank you” page.

Whichever option you select in AWeber, the conversions in Google Analytics will remain the same.
2. Set up URL Based Goal in Google Analytics
Now let us track AWeber conversions in Google Analytics with goals. Let us set up a URL based goal in Google Analytics.
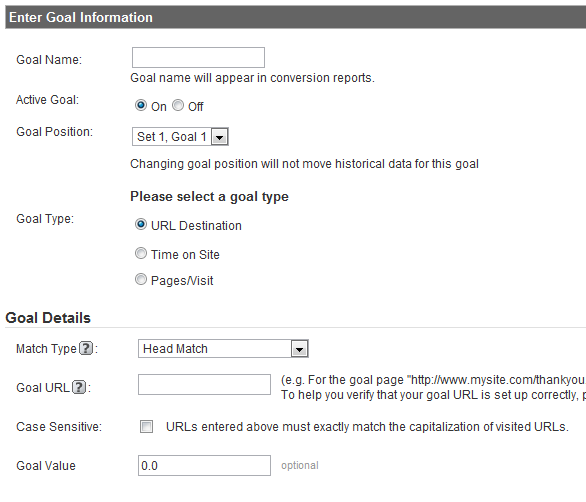
- In your Google Analytics account, select the website profile and click ‘Edit’ under the ‘Actions’ column.
- Under the ‘Goals’ section, click ‘Add goal.’
- Give a suitable name for the goal like AWeber subscriber or any other name that helps you identify the goal correctly. Opt for URL Destination as goal type.
- Enter your thank you page URL in the Goal URL field. Remember, unlike AWeber, Google wants only the non-domain part of the URL. If your “thank you” page is www.mysite.com/thank-you, enter “/thank-you” into the Goal URL box. Reaching this page marks the successful completion of a goal.

Now we will see our subscribers’ conversion data in Google Analytics. Add test data and see if the goals data tracks correctly.
