Google Merchant Center is an eCommerce tool for sellers, retailers, distributors, and manufacturers to let Google know about the product. Moreover, Google’s algorithm will show those products in the organic search. The fun part is, you can connect Google’s merchant center with Google Ads to create shopping ads.
Now the question is, how shopping ads are different from Google’s search Ads?
Google shopping ads are totally different from Google search ads. You don’t see a title and description for the shopping ads. Instead, you see the product details, a product photo and price related information.
As an example, if I search “Diamond Ring for Men” I see the following shopping ads.
1. Vertical Google Shopping Ads
2. Horizontal Google Shopping Ads
3. Google Text Ads
So, we can say that shopping ads appear either horizontally or vertically even before the text ads. The enticing element in shopping ads is product image, price & appealing call outs (like free shipping, money back, instant delivery etc.) that help buyers to make an instant purchase decision.
The important question is “How does Google accurately shows a product to relevant buyers?” That’s where the merchant center comes in. You need to create data feeds in the merchant center. Let’s see what is data feed all about.
A feed, probably a data feed is a set of information about your products in a format supported (.txt & .xml) by Google. Whenever a search related to your product is triggered Google crawls product information from your feed and displays in the search results pages also called Shopping Feed.
Here, a little of SEO is to be done with product info before submitting them to the merchant center. I will talk about generating feed in a while, but before that let me introduce some key attributes of your product data feed.
Key Attributes of a Feed
In order to upload your product info to the merchant center, you need to create a feed. In the merchant center, you get 2 options to create a feed viz – Primary Feed and Supplementary Feed.
1. Primary Feed
Primary feed is the main feed which Google uses to show your products in the merchant center. There are certain data which is necessary in order to effectively show your products when using shopping ads. This information includes the product name, maximum retail price, description, product type, selling price, delivery methods etc.
All these data comprises of a primary feed which makes your ads more powerful and keeps your selling bars high.
2. Supplemental Feed
Additional information about a product which adds value to the overall item being sold is updated using the supplementary feed.
For example, Diamond Rings. The cut, color, carat, clarity with price will be treated as primary feed data whereas the same diamond ring in different stones like amethyst, aquamarine, emerald, topaz & turquoise will be treated as supplementary feed data. This can change depending on your product type.
It’s high time now we set up our merchant account. So, let’s do it.
Log in at Google Merchant Center using your Google account. You will land on the merchant center dashboard which is something like in the image below.
You have a navigation panel and your business name with the merchant account ID on the left side. To the right, you will see the logo with 3 dots that have different functions related to the merchant center. First thing first, update your business information.
Step1: Update primary information about your business like the display name, website, business address and customer service contact details in the About Your Business section.
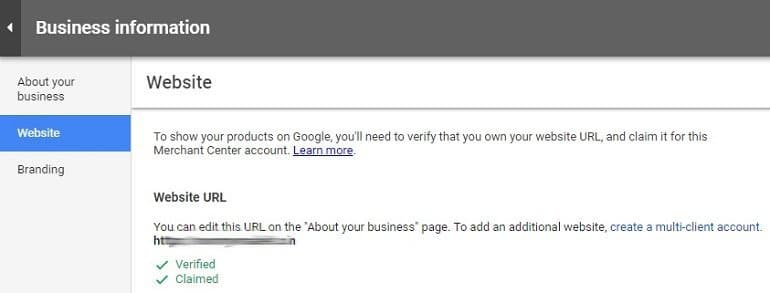
Step 2: Verify your website to show that you are the owner of the website and you claim your site for this merchant ID. The verification process shows that you have the rights to make necessary changes in the site.
You can verify the website using the following methods:
Step 3: Upload brand logos in square and rectangle format for the business in the shopping ads. Required formats for logo images are PNG or SVG and file size not more than 5MB.
Step1: Click Products on the left panel and go to Feeds. Click the blue plus button in Primary Feeds.
While you are creating feeds you will be asked for the country of sale and languages as it is important for Google to know where you will be selling your products.
Step 2: Name your feed just as I did like “PF01” and select an option to connect your data with the merchant center. There are 4 methods using which you can feed product info in the merchant center and they be like – Google Sheets, Scheduled Fetch, Upload and Content API.
As of now, we will continue with Scheduled Fetch which is an easy and automated method to update data in the merchant center. What happens in a scheduled fetch is Google check for updates regularly from data provided on your website.
Step 3: Enter the file name and set the fetch frequency on daily (recommended), weekly or monthly basis. If your website product listings aren’t updated daily then schedule the fetch on weekly basis.
Provide the final URL from where the data shall be fetched. If there are any password-protected file then enter the login details or else leave blank. Click Continue.
The continue button will take you to the GMC dashboard where you can see the list of active feeds. Click on the respective feed to make changes or delete the entire feed. Refer to the image.
Step 4: Click on the latest feed to start the data fetch process from your website. Click the FETCH NOW option and the feed upload process shall begin. You can see the feed properties, input method, date and timings of your latest data fetch.
The data fetching process being automated you don’t have to manually input. The feed will crawl your website and gather product data for the merchant center to either organically display them or use them to make shopping ads.
At times you may need to address some feed issues. While may encounter issues like feed creation issues, feed registration issues, formatting issues, uploading issues or fetching issues. I have purposely taken examples of most common issues in a scheduled fetch. Refer to them below.
SSL Certificate Expired
Check if your feed url is on HTTPS or HTTP and if you are using an HTTPS, it has a valid SSL certificate for the domain. Browse the feed url in the browser and see if you get a green padlock for the SSL.
Feed File Format Not Supported
The file format for feed should be in XML and not an HTML product list page. If you aren’t sure about the feed url, check with your developer who can provide you with the feed url for your eCommerce CMS being used. As an example, WordPress and WooCommerce, one can use Woocommerce Google Feed Manager to generate the product feed.
All the consolidated item, feed and account issues are reported in the Diagnostics section. Click on the feed name for detailed reports.
Link your Google ads account with to enable shopping ads in Google Ads.
I will recommend you to also create Google My Business (GMB) Page and link Google Merchant Center with Google My Business page.
An organized merchant center with all products details can streamline your marketing efforts and help you get maximum out of your advertising on Google.
Free Google Ads Tutorial for an absolute beginner covering campaigns and their types, networks, keywords,…
Do you want to make money programming in Java? Here are 6 creative ways for…
9 smart ways for freelancers to achieve financial freedom. First, you have to believe it…
With so many programming languages and resources available, it can be information overall to learn…
Wise review from an Indian freelancers point of view to receive payments in India. How…
There are 3 types of clients who want you to lower the price. How to…