Answering the question – How to add a second location or more than one location in Google My Business or GMB Local Listing?
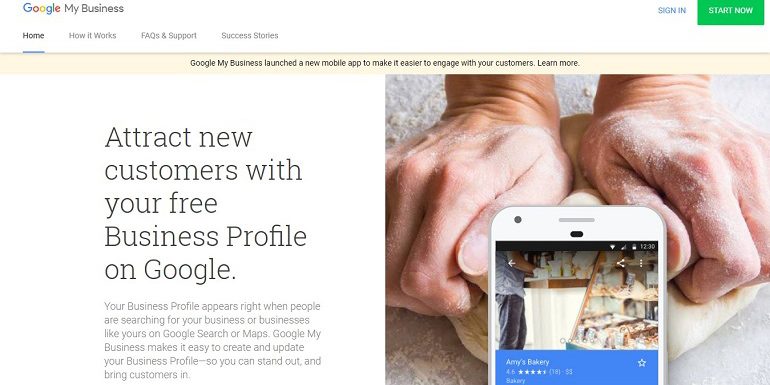
Adding the second location in Google My Business, aka GMB tool, is easy.
Locate the Post tab on the left side of the GMB dashboard. Click the tab, and it will display the options. It is as easy as filling up an online form. The same goes for adding first, second, or next location in the GMB tool.
But first…
Let’s take a brief overview of this fantastic tool and the potential benefits of using it for an online business.
Overview: Google My Business Tool
Google, my business, is a free local listing tool. It’s an excellent product from Google Inc. The tool manages every single information of both online and offline businesses.
GMB is more of a personal relationship & brand building tool than a listing tool. If you haven’t listed your business on GMB yet, then refer The Complete Guide to Setup a Google My Business Page. It will help you know the pre-requisites for GMB registration. Using this guide, one can easily set up a highly optimized local business listing on GMB.
Once the setup is over, refer to Why Every Local Business Should Consider Google My Business. The article will help you understand how to leverage the GMB tool to gain maximum mileage in the local search results.
Okay, now back to the original query – How to add the second location using the GMB tool?
So, let’s see what the options to add a second business location in GMB are.
How to Add the Second Location to an Existing Local Business in Google My Business
Access the existing business listing by logging using a Gmail address. Make sure the current listing is the same as to which a second location needs to be added. Once logged in, you will see the GMB dashboard.
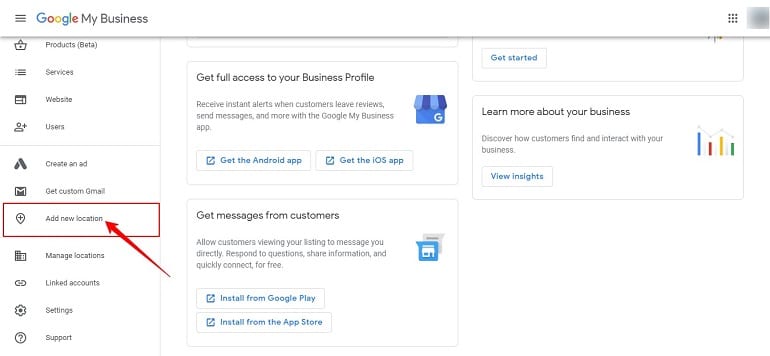
Scroll to the bottom on the left side of the dashboard to locate the Add New Location tab. Refer to the image below.
Click the Add New Location tab. A new window will open with a search bar. See the image below.
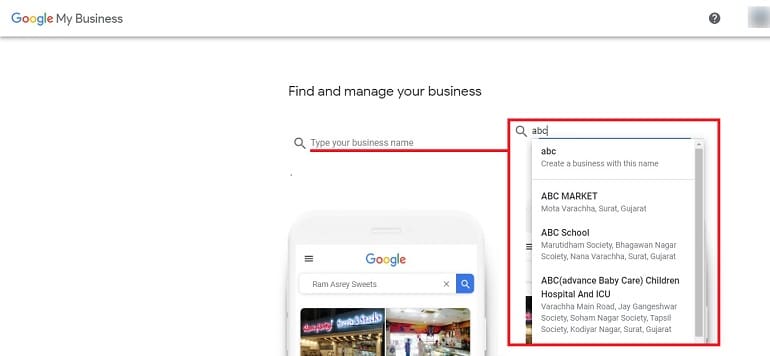
Type the new location and hit enter. Now Google will ask you to register the new address. It is because every new location is treated as a new business entry in the GMB tool. See the image above.
User will have to go through all the steps similar to what he/she did during the first time registration. While adding a second location, there are few common errors one might come across. Let’s see what they are.
Common Error #1 This Listing has already been claimed
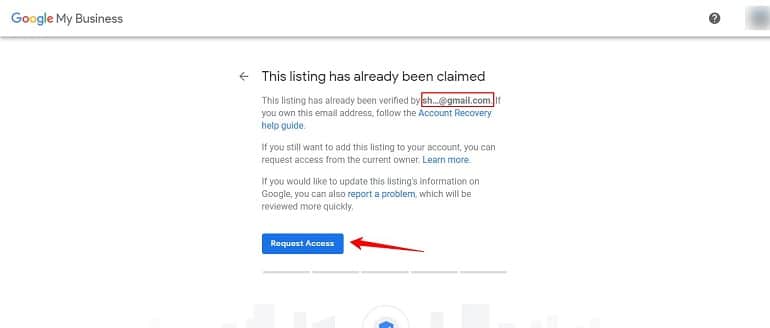
Users will get this error when trying to claim someone else’s business. Use the exact business name.
Common Error #2 You already manage this listing
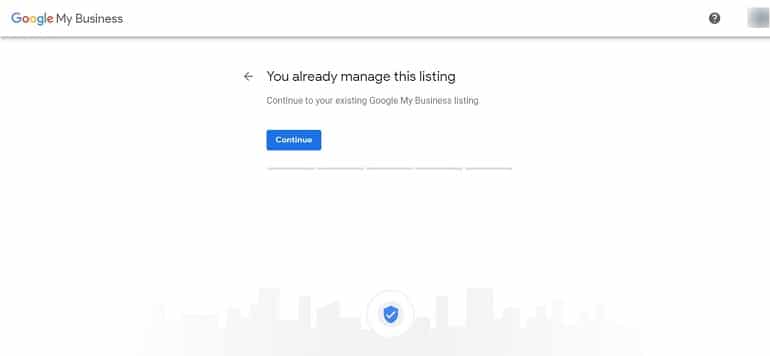
When a user searches for a business location or name which is already registered, this error will show up. Either continue or go back.
Common Error #3 I own or manage another business
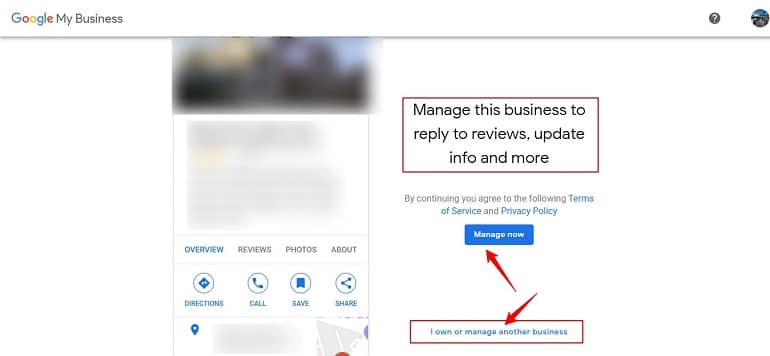
It happens when you don’t own or operate a business listing that is already registered and claimed by someone else. That someone else could possibly be an owner or user, who manages that particular business. Go back and try again.
So, that was all with adding a new location using the Add New Location feature. Now I will show you how you an alternate method to add the second location in GMB.
Adding Second Location Using the Manage Locations Feature
You know the drill. Click Manage Locations in the left panel. Refer to the image below.
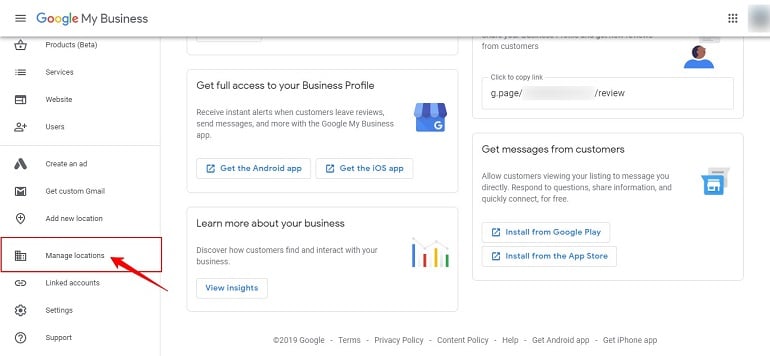
Doing this will take you the manage locations page. Here one can see all the verified locations of a registered business. See the image below.

Click Add Location button in blue. It’s a drop-down button. The blue button carries two options:
- Add Single Location
- Import Locations
Add Single Location
This option is similar to the Add a new location. I have already discussed it above. If you have skipped, scroll up and refer it now.
Import Locations
The import locations option is used to upload multiple locations using an excel spreadsheet. When you click the import locations option, a window will pop up. See the image below.
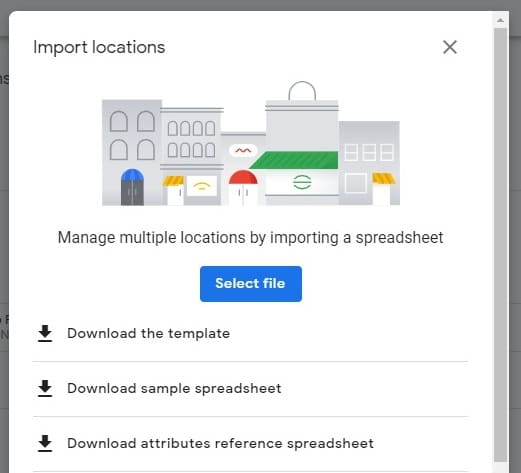
Here again, there are three options.
- Download the template – There’s a readymade template in XLSX and CSV format. Download the template. Fill in the business location and other details. Then, upload the file using the Select File option.
- Download Sample Spreadsheet – The sample sheet is an example that will help the user to fill correct details in the required formats. Hence download the sample spreadsheet first to study.
- Download Attribute Reference Spreadsheet – This spreadsheet has a name, type, and acceptable values of an attribute. It’s a reference document. It is advisable to refer a reference document first and then submit a spreadsheet with original details. Possible errors will be less.
So, the first option is what a user should be dealing with, while the other two are samples and references.
Final Thoughts
I recommend using the first option, Add New Location. It’s easy and self-explanatory. Moreover, there’s no complex spreadsheet work in it.
Follow the steps, search, verify, and claim the business location, and it’s done. The process remains the same while adding the “n” number of business locations one by one.
But if you have multiple locations pan India or across the globe, the spreadsheet is a better option. It is more relevant for multinational brands like Nike, Reebok, Gucci, Levis, etc. holding multi-location stores.
It will be a tedious job to add multiple locations one by one. Use the spreadsheet, fill in the details, and add all locations in one shot.
