Step by step guide to show how to remove and Uninstall W3 Total Cache completely and delete any erroneous files and settings.
Let me share how to remove and uninstall W3 Total Cache manually to ensure it is completely removed from your WordPress install. So one can install other caching plugins including the one I use and recommend that is WP Rocket.
You can check the comparison of WP Rocket with W3 Total Cache here or read my review of WP Rocket here.
Now let’s begin uninstallation of W3 Total Cache.
1. Disable all Settings Under General
Under the General Settings, disable everything:
- Preview mode – Disable
- Page Cache – Disable
- Minify – Disable
- Opcode Cache – Disable
- Database Cache – Disable
- Object Cache – Disable
- Browser Cache – Disable
- CDN – Disable
- Reverse Proxy – Disable
- User Experience > Lazy Loading – Disable
- Fragment Cache – Disable
And then click “Save all settings”.
Once done, the plugin will become disabled as shown here:
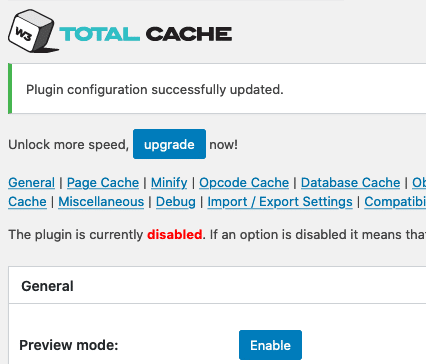
At the top of the General Settings page, a message confirming that “The plugin is currently disabled.” means we are good to proceed further.
2. Deactivate and Delete the Plugin
Once all the settings for the W3 Total Cache plugin are disabled, it is now safe to de-activate the plugin and then delete it.
In the WordPress admin area, visit the Plugins page
Click “Deactivate” for W3 Total Cache Plugin.

Once the plugin is deactivated, you will see the “Delete” button. Click Delete.

3. Delete Drop-Ins Files
W3 Total Cache creates 3 files inside the wp-content folder. WordPress calls them “Drop-Ins” and you can find them listed as Drop-Ins on the Plugins page.
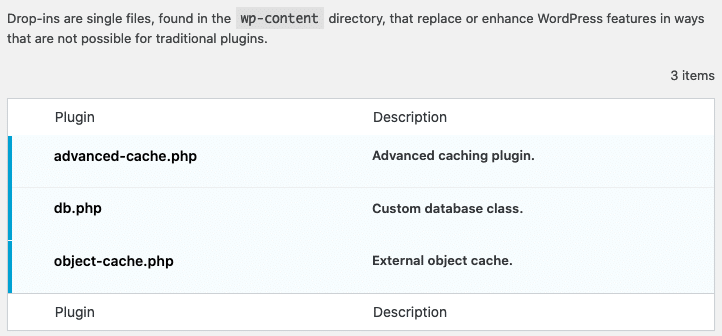
The files created are
- db.php
- advanced-cache.php
- object-cache.php
Once we disable database cache, page cache, and browser cache, these files are deleted. However, in some cases, if the plugins cannot delete them, they do remain.
So check if these 3 file exists inside the wp-content folder and if they do, delete them.
You will either need to use FTP to access the server’s wp-content folder or CPanel’s file manager. However, one can also consider using the WordPress File Manager plugin as well.
4. Delete wp-content/w3tc-config Folder
The w3tc-config inside the wp-content folder also remains in case the plugin can’t delete the folder due to permissions.
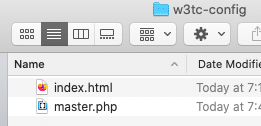
So, if the folder exists, delete it. Again, you will either need to use FTP to access the server’s wp-content folder or CPanel’s file manager.
5. Remove WP_CACHE from Config
At the very top of the wp-config file, you will find WP_CACHE defined as true by W3 Total Cache.

Adding forward-slash twice before the define statement will comment it out.
If you are not sure it is ok to let the same remain. WordPress is smart enough to ignore if there isn’t a cache plugin available for use.
6. Delete Folder wp-content/cache
Finally, we should also delete the cache files that were created by the W3 Total Cache plugin to uninstall it completely.
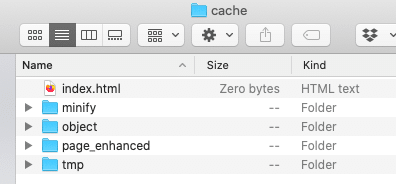
Delete the complete cache folder inside the wp-content folder. It contains all the caching data stored in files. Again, you will either need to use FTP to access the server’s wp-content folder or CPanel’s file manager.
7. Remove W3TC .htaccess Code
W3TC adds a lot of code in the .htacess file. Verify all the code by W3TC has been deleted. In step 1, when we disabled each option, the plugin removes its associated code from the .htaccess file. However, it is worth checking.
For browser cache, the code is between
- # BEGIN W3TC Browser Cache
- # END W3TC Browser Cache
For CDN the code is between
- # BEGIN W3TC CDN
- # END W3TC CDN
For page cache, the code is between
- # BEGIN W3TC Page Cache core
- # END W3TC Page Cache core
Ideally, you can remove any code between # BEGIN W3TC … and # END W3TC … from the .htaccess file. Still, if you are not sure how to edit the htaccess file or if you doubt it can break the site, replace the htaccess file with the default htaccess by WordPress.
