Imagify Review and Why it is the most essential WordPress plugin to optimize images and generate next-generation fast loading webp images.

asIn my review of Imagify, I will share why it is the best way to optimize images in WordPress in 2020. So stay tuned.
There is no denying the fact that images occupy a significant chunk of the time a page needs to load. Even serving images from a CDN, if they are not well optimized, can take up a lot of time. Moreover, CDN storage costs money. So if you are uploading larger images, they charge you a lot more money.
One can reduce the size of the images to speed up the page load time.
We will see how Imagify not only reduces the image size but also generates a new image format for the web (.webp), which is very useful and faster to load. Moreover, it also takes care of the issue that some browser (Safari) that doesn’t support those image format to serve the traditional image format aka jpg and png.
What is Imagify?
Imagify is an image compression software as a service provider that offers a WordPress plugin to compress images and serve the new image format available for the web. It provides three different image compression and resizing levels.
Imagify offers features beyond image compression. Like I said above, the 3 level compression – Normal, Aggressive, and Ultra mode- is impeccable.
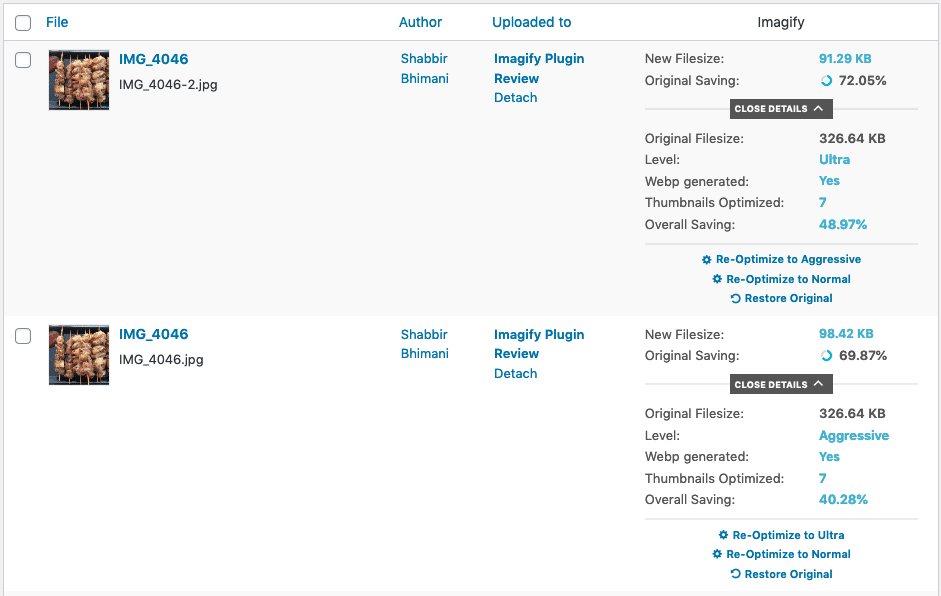
Imagify integrates itself into the WordPress Image library, and one can optimize each image to Normal, aggressive, or Ultra levels.
There are a few more features that place Imagify way above its competitors. Before we dig deep, let’s take a quick look at how to use the Imagify plugin.
How to Compress Images in WordPress Using Imagify Plugin?
The plugin is free and available on WordPress.org. You need to install, activate, and do a quick setup. Let me show you how.
After installation and activation, the plugin will prompt you to sign up with an API and configure settings. To do this, enter your email address to get an API key.

Click the signup button. Provide an email address to receive an API key. Copy the key and click I have my API key button and paste it here and click the connect me button.
The plugin will verify your API key and further allow you to configure the Imagify settings. Now you can optimize your images.
Imagify Review: The Best Part
These are the things that set apart Imagify from their peers.
1. Side by Side Comparison
Configuring the optimization settings is the next step. Refer to the image below:
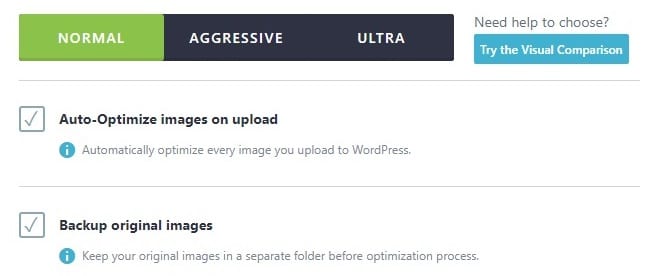
- Normal – At the normal level, the image quality remains intact. However, there’s no significant change in size.
- Aggressive – The aggressive mode alters the image size without any significant loss in the quality.
- Ultra – The ultra mode delivers maximum savings in the file size. Besides, your image quality can deteriorate in some particular cases.
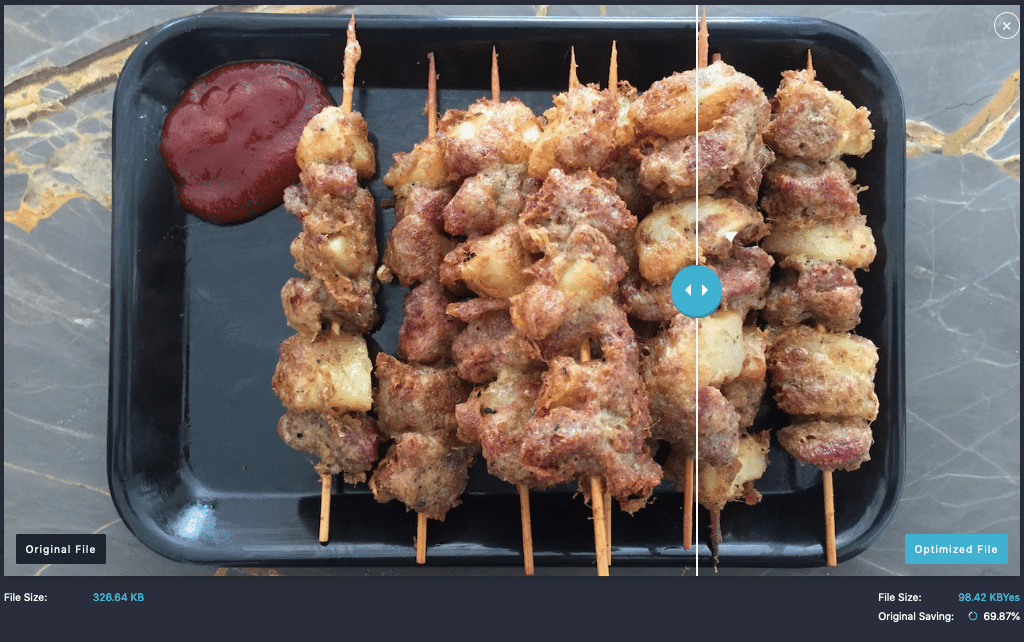
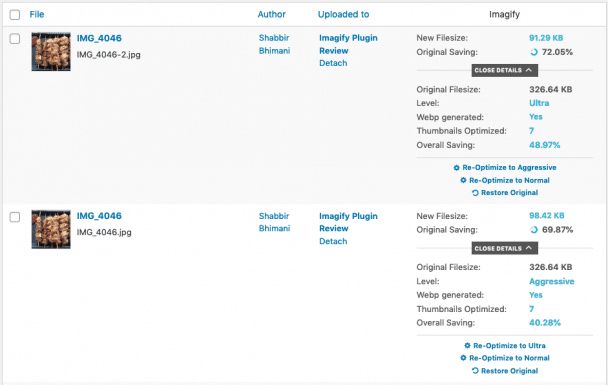
The best choice in most cases is the aggressive mode. Here is one of the images from my Recipe Blog captured from a high res camera. Optimizing it in aggressive mode saves 69% in file size.
The same image, when optimized in Ultra Mode saves 72% of the file size.
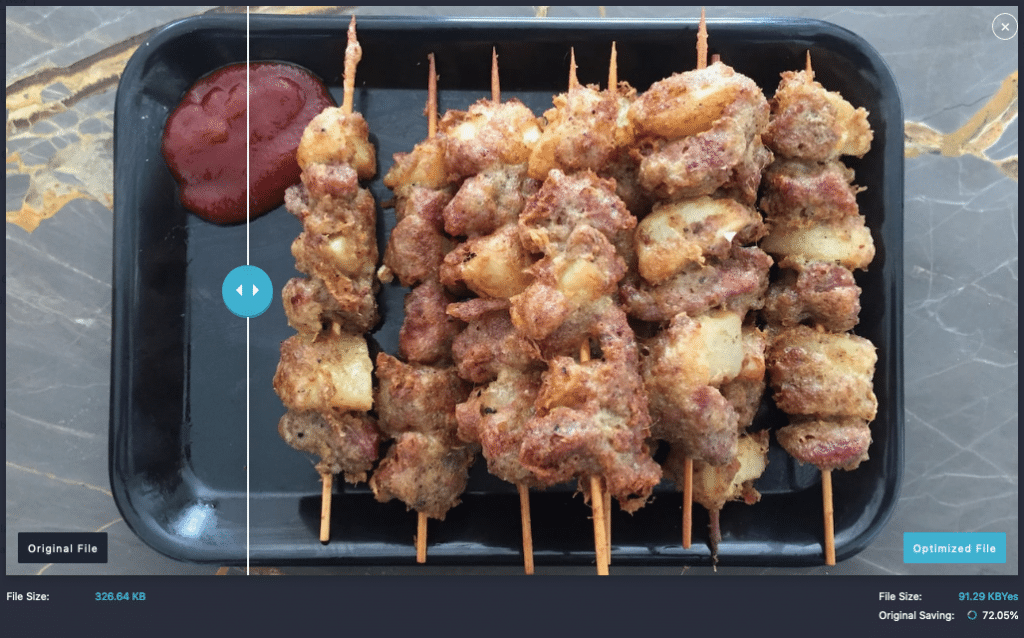
Aggressive mode is a better choice. Moreover, in Ultra Mode, I have seen the BizTips blue logo has some visible quality issues.
It is better to optimize an image from your library in each mode and see which one works better for you. Moreover, even if you have selected a mode for a picture, each image can be optimized for different modes as and when you find an issue in the image quality.
The best part of the plugin is, it has a visual compare for each mode. This simulation shows the original file size along with the reduced one. Doing this, you get thorough with the basic understanding of image optimization.
On top of it, a user can select whether or not to Auto-Optimize images on upload. Plus, whether or not to backup original images. If one chooses to backup, the plugin will store an unedited copy of the image in a separate folder on your server.
2. Support for WEBP Format and Browser Compatibility
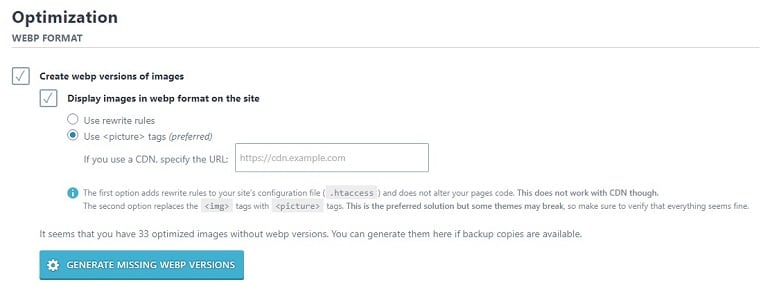
The best part about Imagify and one of the main reasons I like Imagify over its competitors like WP Smush or TinyPNG is its ability to generate WebP Image format. The webp Image format is by Google, which is super fast to load. Firefox and chrome support WebP, but Safari still doesn’t support it. So Imagify renders no-webp images for such browsers.
3. Auto Resize and Other Misc Features
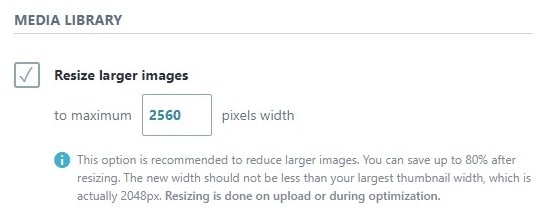
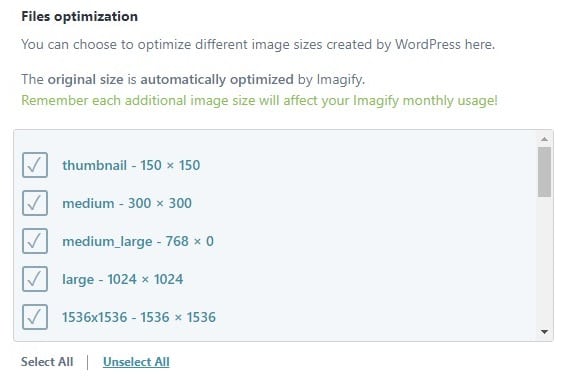
Further, the user has an option to auto-resize larger images to maximum width. For example, your theme allows a max width of 1024; then, you can resize large images to 1024 so that it doesn’t crop. It’s ideal for bloggers.
4. Add Sub Accounts with Limits
In my Imagify account, I can create sub-accounts and allow a certain amount of my pooled data quota to be used in that sub-account. So, it will enable me to use the same account for all my blogs.

Moreover, I can also set a predefined limit of data available for use in each sub-accounts.
How to Bulk Compress WordPress Images with Imagify?
All new images will get auto-optimized when you set this feature on while configuring Imagify settings. Not only new but old images that are already present on the website can also be optimized. Let me tell you how.
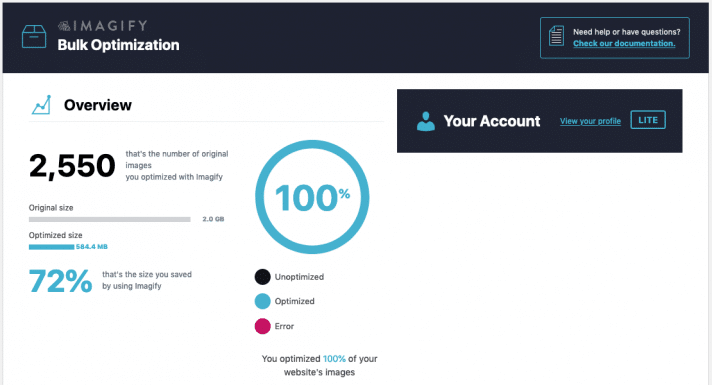
Bulk image optimization is the solution. The plugin includes a bulk optimizer. You can find it on the left panel under the media tab (media → bulk optimization). The plugin had made old image optimization ridiculously easy. Just one click, and all old images will be optimized based on the compression level you select.
Plans & Pricing
Imagify offers a free plan up to 25MB monthly. It means one can optimize roughly 60 images with 300KB as the file size. Now any website or blog will easily and very quickly cross the 25MB limit. In that case, a paid plan will be a necessity to compress images.
Imagify Monthly Plans

The beginner (lite) plan in Imagify allows 1GB, which is approx 10000 images for $4.99 per month. Quite cheaper option and works well for me for all my blogs, including the Recipe blog. Alongside Imagify has basic, standard, plus, and enterprise-level plans for huge requirements. In short, your image compression and resizing starts at $4.99 and goes up to $69.99 per month.
The Imagify One-time Plans
If your blog has a lot more images, you can choose a one-time payment to optimize the images in bulk in one go.
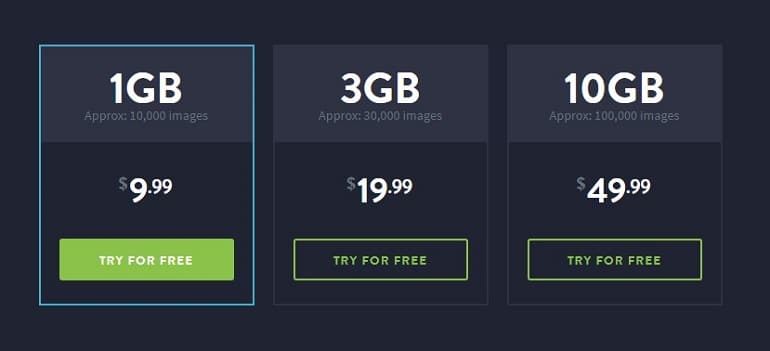
In this plan, you pay only once. It is for those having lots of existing images that need to be optimized. The plan starts from 1GB (approx 10000 images) $9.99 and goes up to 10GB (approx 100,000 images) $49.99.
Imagify Review: Not so Good Things
Three significant things need to improve in Imagifiy.
1. Yearly Payment with Monthly Bandwidth Restrictions
In my lite account, I paid for one full year. So ideally, I paid for 1GB of data each month. It also means I paid for 12GB of data.
So when I started using Imagify, past images needed optimization, and WEBP format generation. I don’t need 1GB worth of data each month in all my blogs combined. So, ideally, I wouldn’t want to take up additional GB plans. So once I have made the payment for the full year, I should be allowed to use more data upfront.
As you can see from the above screenshot, the images optimized is around 2GB for BizTips. It took me around three odd months to complete the whole of the past images optimization process as I had to wait for a monthly renewal date.
2. Plans Pricing Need to be Consistent
- 1GB per month plan is $4.99
- 2GB per month is $8.99
So for an additional GB, I had to pay $4. Now if I want an additional GB, the price per GB is $9.99
When I started using Imagify, I thought of buying additional GB of data to complete the bulk optimization but then found the pricing to be inconsistent for purchasing additional GB. The better route would have been, I upgrade the monthly plan and do the conversion and then downgrade it.
I preferred not doing it that way and was ok to do it slowly over time.
3. The Bulk process has to run with browser open
With 2000+ image files on BizTips and a similar number of files on TastedRecipes, I would have preferred if I can run the bulk optimization process using a cron job.
The only way to run the process is to start it and keep the browser window open, so each file is processed one by one.
I found a workaround to it with the Image library, where one can request to optimize 200 files in one go in Imagify via the media library. Once they are done, the files will convert and get back on your server even if the browser is closed.
Using Screen Options, one can display 200 images on a page. Select all, and in the bulk edit option, there is a choice to Optimize all selected images in one shot.
Final Thoughts
Imagify is an essential WordPress plugin. I like how the optimization modes, along with an option to compare each optimized image visually. Moreover, the WEBP format is the icing on the cake.
