How to Integrate CDN or content delivery network like KeyCDN, Cloudfront or StackPath in vBulletin 3.x correctly. Step by step Guide

If you wish to optimize vBulletin for better user experience, a content delivery network or CDN can help. Any CDN integrated can work with vBulletin 3.x and make the forum load much faster for better user experience as well as in SEO.
If you are using vBulletin 3.8 or lesser and have no plans moving over to vBulletin 4 (and you shouldn’t as well), you can still use a CDN.
Let me share with you how.
1. Create a Pull Zone in the CDN
The first step to integrating CDN into vBulletin is to create a pull zone in the CDN. The pull zone means the content of the site is pulled over to the CDN.
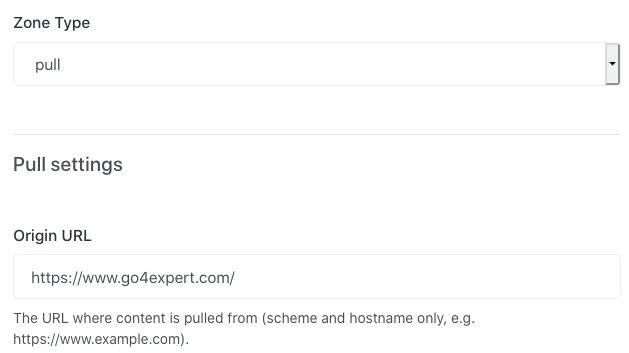
Every CDN will have a pull origin, which should be your forum URL or vBulletin root URL. If you are using KeyCDN, use add a new zone and mention the origin as your forum url.

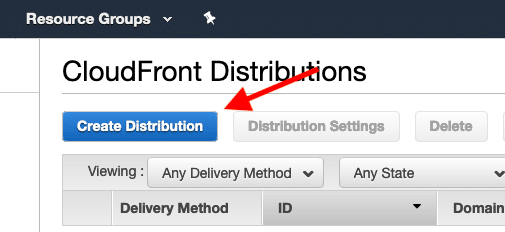
If you prefer using Amazon Cloudfront, Use the Create Distribution process.

For the complete process to create a distribution in Amazon CloudFront, refer to the guide here.
Once you have the pull zone part is done, you will have a url to the distribution. For CloudFront, the url will be or the form dxxxx.cloudfront.net. For KeyCDN it is of the form Zone_Name-XXXX.kxcdn.com. Once you have the Pull zone, visit the URL in the browser, and it should show a copy of the forum.
Now we will make changes in vBulletin to use the new images and CSS paths.
2. vBulletin Image Paths
Admin CP > Styles & Templates > Style Manager > and select StyleVars from Combobox. Edit the Image Paths to the new URLs
- images/buttons become //CDN_Path/images/buttons
- images/misc becomes //CDN_Path/images/misc
And so on for all the image paths.
Note: Path can either start with // or can use the HTTPS:
3. vBulletin Replacement Variable
We will need a few replacement variables to be configured to change the other Image paths like post icons. Visit Admin CP > Styles & Templates > Replacement Variable Manager and create the following Replacement Variables.
Search for Text : src="images/
Replace with Text : src="https://CDN_Path/images/
Similarly, for clienscripts, Create three more replacement variables.
href="clientscripttohref="https://CDN_Path/clientscriptsrc="clientscripttosrc="https://CDN_Path/clientscripturl("clientscripttourl("https://CDN_Path/clientscript
Once you have the above replacement variables in place, browse through your forum to see everything is working fine. You can check the source of your HTML webpage to see all the images and clientscripts are being fetched from the CDN URLs or can wait for few seconds to see the hits and misses reports in CDN.
If everything is working fine, we will move to custom avatars and other images that need to be moved to the images folder for it to be using the CDN.
4. Custom Avatars and Images
To Move the custom avatars and other user images to be served from CDN, all you have to do is move them under the images folder. Now the replacement variable will take care of it automatically. Make sure you have the URLs Relative to your forum home.
Visit Admin CP > Avatars > User Picture Storage Type and change the
- Avatars to be served from the filesystem at ./images/customavatars and URL is images/customavatars relative to forumhome
- Profile pictures to be served from the filesystem at ./images/customprofilepics and URL is images/customprofilepics relative to forumhome
- Signature pictures to be served from the filesystem at ./images/signaturepics and URL is images/signaturepics relative to forumhome
Similarly, change the Social Groups > Social Group Icon Storage Type and User Albums > Album Picture Storage Type under the forumroot/images folder
