What is an SSL Certificate? What is Let’s Encrypt? How to install a free SSL certificate of Let’s Encrypt on shared cPanel hosting?

HTTPS is a MUST for every website, blog or eCommerce store.
Visit your website with HTTPS://YOURDOMAIN, and you will see a nonsecure page warning if it doesn’t have a valid SSL certificate for the domain.
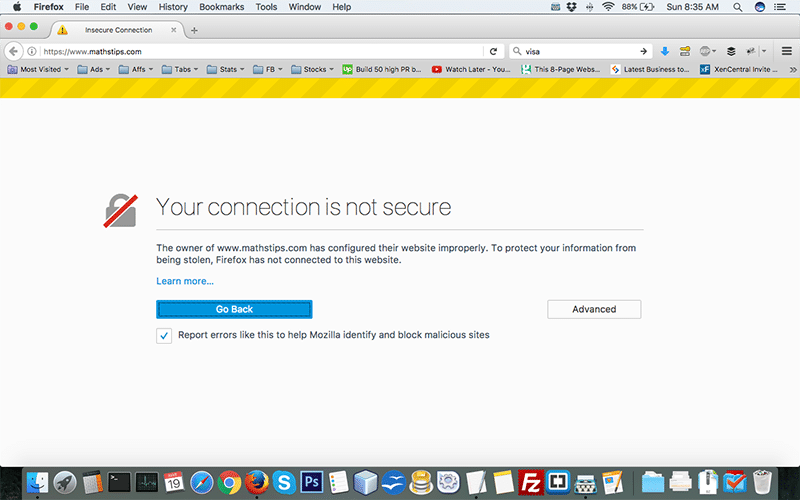
To make a website work on HTTPS, one needs an SSL certificate. But before we dive into more details, let us understand the basic lingos.
What is an SSL Certificate?
SSL stands for Secured Sockets Layer. It’s a protocol to encrypt and authenticate the data sent between the browser and the web server.
It ensures secured browsing for a user. As an example, for an eCommerce website, it helps in securing the transmission of user data for authentications.
So to make sure the server transmits data using the right protocol, one has to configure the server using the secured layer and provide an SSL certificate for the same. We will use Let’s Encrypt to generate a certificate for our web server.
Don’t worry if it is too technical. We only need to make a few clicks to get the things up and running.
What is Let’s Encrypt?
Let’s Encrypt is an open certificate authority (CA). It provides free and automated SSL certificates for websites. It’s a service provided by the Internet Security Research Group (ISRG). According to Wikipedia, the ISRG is a Californian public-benefit corporation which focuses on Internet security.
Let’s Encrypt provides digital certificates to enable HTTPS (SSL/TLS) for websites in the most user-friendly way. The reason for offering free SSL is to create a secure and private web browsing experience.
Most shared hosts offer free SSL certificate by Let’s Encrypt. We will use Siteground as an example here, but the process of installing a free SSL certificate by Let’s encrypt should remain the same in all CPanel based host and requires only a few clicks.
Prerequisites for Installing a Let’s Encrypt Certificate
There are couple pre-requisite for a domain to install a free Let’s Encrypt certificate:
- The domain or the subdomain should point to the host. If you happen to change the DNS, please wait for the DNS changes to complete before one can install a let’s encrypt certificate.
- The HTTP to HTTPS redirect should not be on else it will not allow the validation to complete. If you have such redirects, remove them until the certificate’s installation is complete. Re-add them later once the certificate installation is successful.
How to Install Free SSL Certificate Using Let’s Encrypt?
I will use Siteground, but the process will be similar in any CPanel based host.
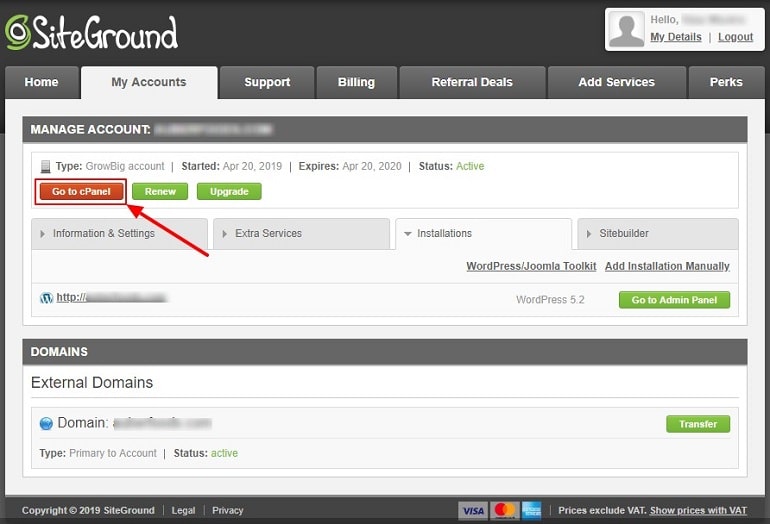
Log in to your Siteground account. Click on My Accounts tab to locate the Security section. Refer to the below image.
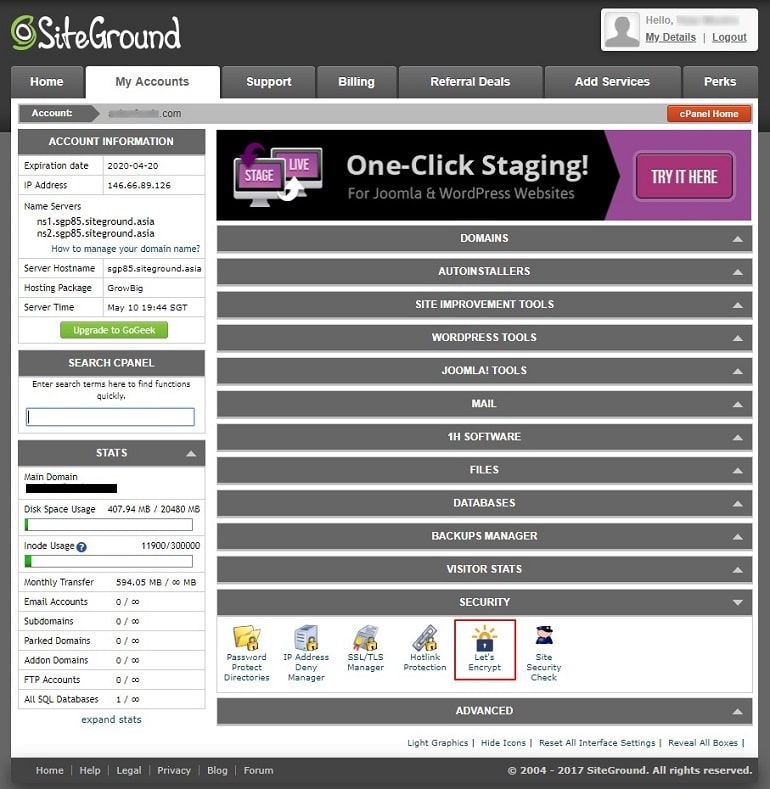
Click the Let’s Encrypt tool in the Security section.
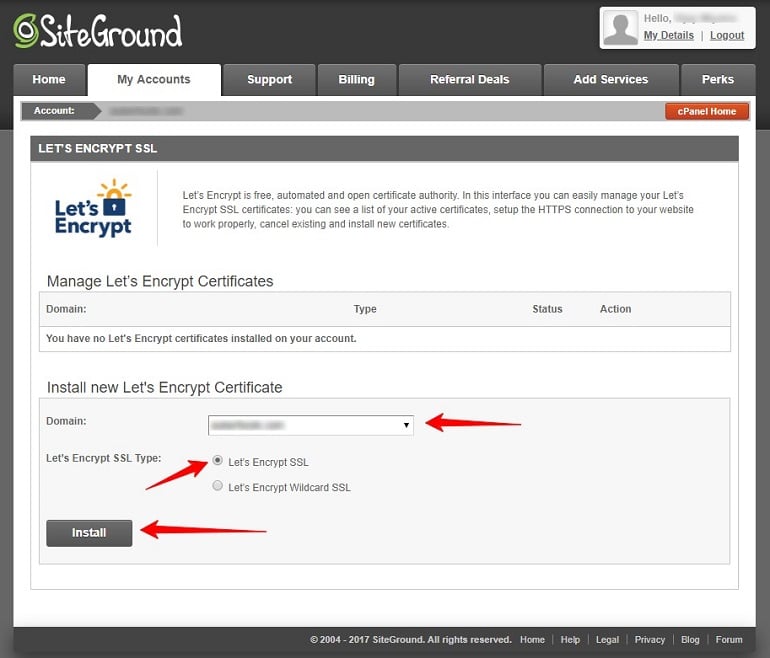
Select the domain name you wish to install an SSL to from the drop-down menu. Now, click the radio button “Let’s Encrypt SSL.”
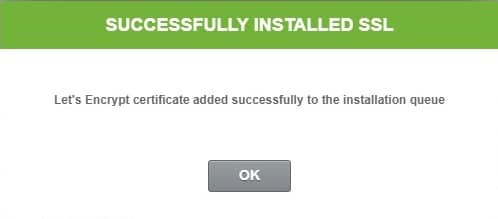
The next moment you will get a message of Successfully Installed SSL message.
But wait!!!
The installation of a certificate isn’t complete. It is in the installation queue which can take a few minutes to complete.
Once the installation is complete, the page will say a working SSL certificate installed and working fine.
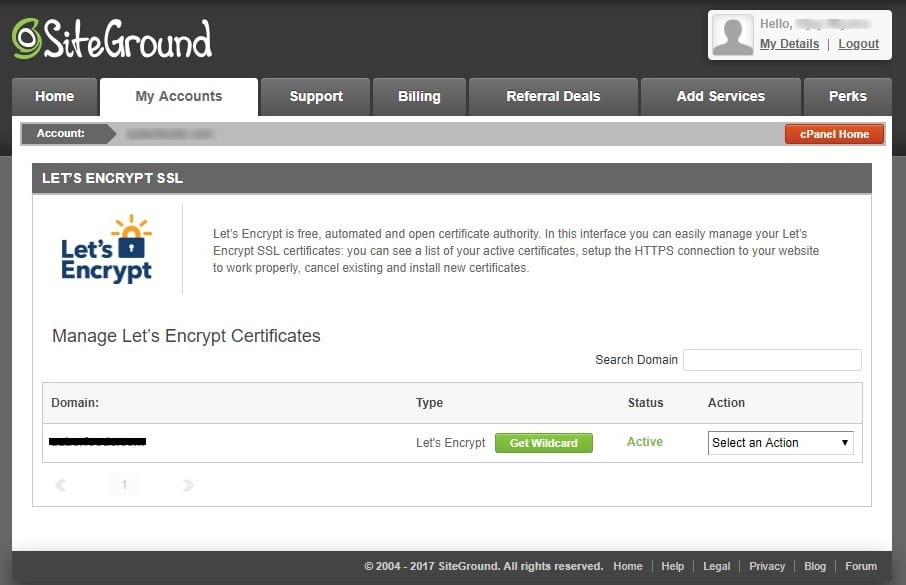
Now visit the site with HTTPS and the unsecured warning should go away.
How to Cancel a Let’s Encrypt Certificate?
To cancel a Let’s Encrypt certificate click on the drop-down menu in the Action tab. Select the Cancel option. Click the Confirm button in the pop-up.
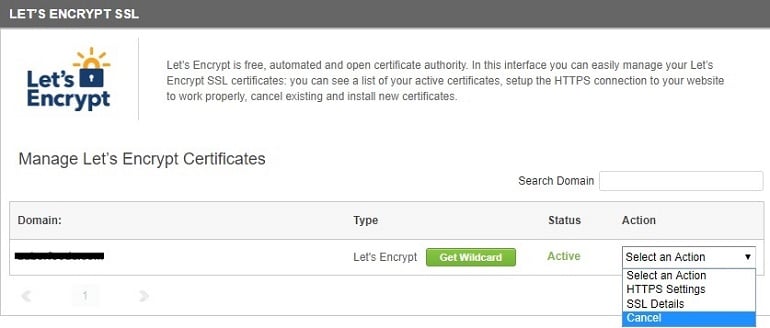
A key point here is when you cancel the certificate your website will again become unsecured. Moreover, it will show an HTTPS unsecured page warning. Replace with a new certificate ASAP, or users will continue to get unsecured page warning.
How to Renew a Let’s Encrypt Certificate?
Generally, the user needs to renew the SSL certificate after a year but Let’s Encrypt certificate expires every 90 days. With Siteground, the renewal is automatic until the user cancels the certificate.
