How to add products to the Snapdeal marketplace using the Snapdeal seller interface. An easy to follow step by step guide with screenshots.

Adding products to the Snapdeal seller account is what one has to do as soon as the Snapdeal seller registration process is complete.
So without much of an ado let me show you how to add products one-by-one in Snapdeal.
How to Create a Single Listing in Snapdeal?
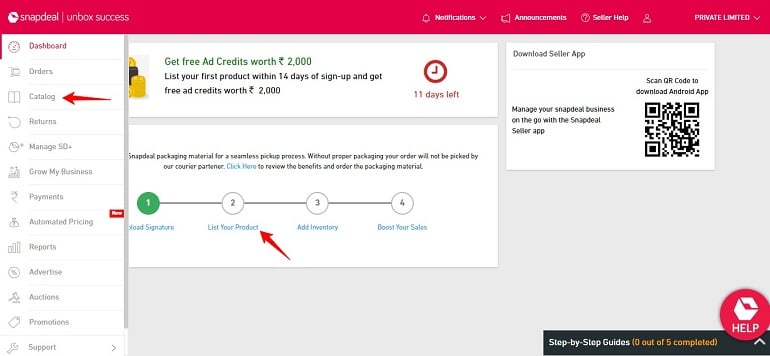
Log in to your Snapdeal seller account. Click the catalog option in the left panel. The system will show step by step guides aka to-do list to newly registered seller accounts on the dashboard screen. For example, the image below shows the list of tasks to be done in a hierarchical manner. Click list your product link.
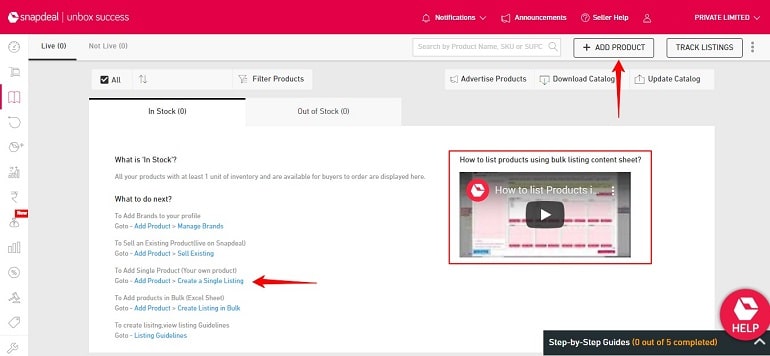
Doing this will take you to the stock and catalog section. Here click +add product button on the top right corner. Besides, you can go to the product listing interface using the create a single listing link. Refer to the image below.
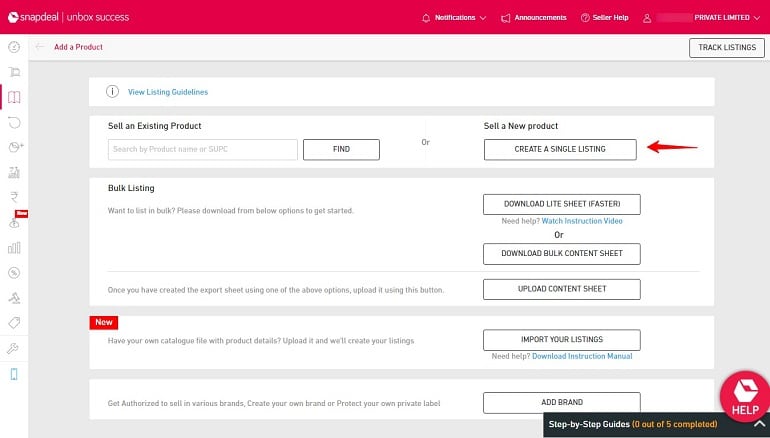
The add product section offers innovative methods to list items in your Snapdeal seller account. For example, you can add products one by one or in bulk using an excel sheet. On top of it if you have products listed on other platforms you can import them here too. Since we will add products one by one click create a single listing.
Product Creation
Finally, we have arrived on the product creation page. Now, why am I using the word creation? It means manually adding every single product detail from scratch. That’s a tardy work for seasoned sellers but totally advisable for newbies. This will help new sellers get into the product uploading environment on Snapdeal.
I eternally tell this to my blog readers, especially new online sellers – Always add products one at a time. Get along with the features and then go with bulk listing. Do not attempt to list products using an excel file unless you know how to do it. Once you are accustomed to the excel spreadsheets and how to use it to add products then only go for it.
1. Category
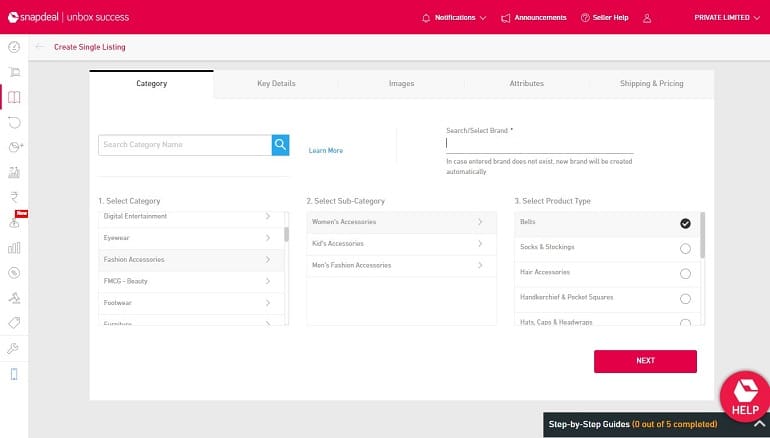
Select the product category, sub-category, and product type. In addition, select your brand. Click next to continue.
2. Key Details
Enter key product details like SKU, product description, UPC, and EAN. The brand name is auto-filled. Whereas the product name (product title) attribute is uneditable. It is because the system doesn’t allow the seller to manually write the name of the product.
The system automatically creates a product name based on the product details provided by sellers. For example, brand name + common name of the product + weight. This is exactly how Snapdeal creates product titles.
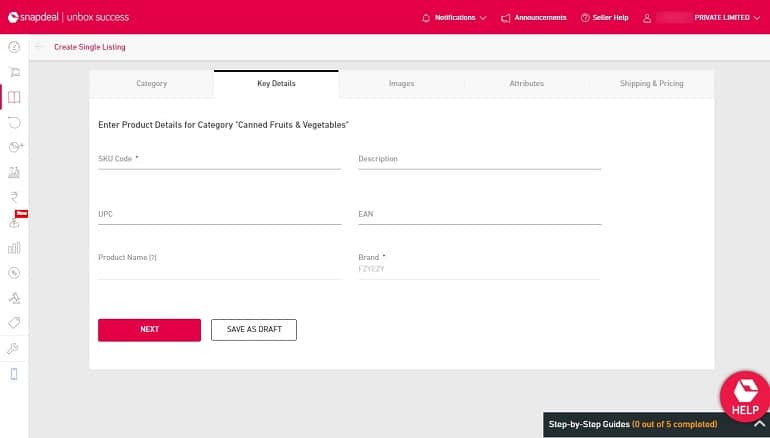
UPC and EAN are barcode numbers. Enter the details if you have or else leave it blank. This info isn’t mandatory. Click next to continue.
3. Images
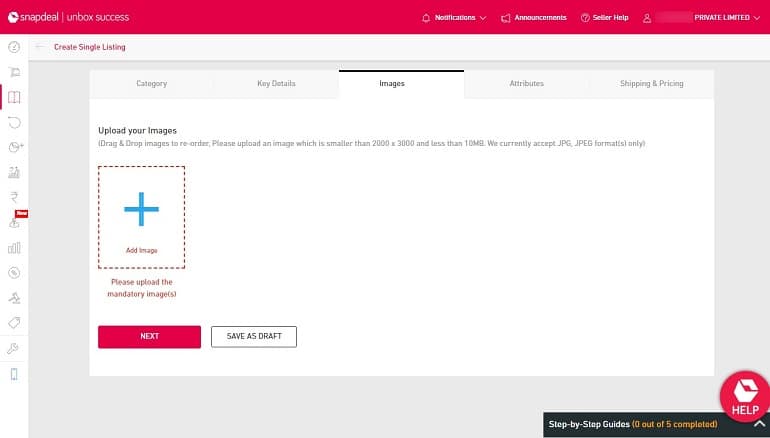
Pretty self-explanatory. However, the system requires 4 mandatory product images. It’s just drag and drop. Moreover, you can even reorder the images after uploading them. Reordering is not available on Amazon. Sellers will have upload images in a static order.
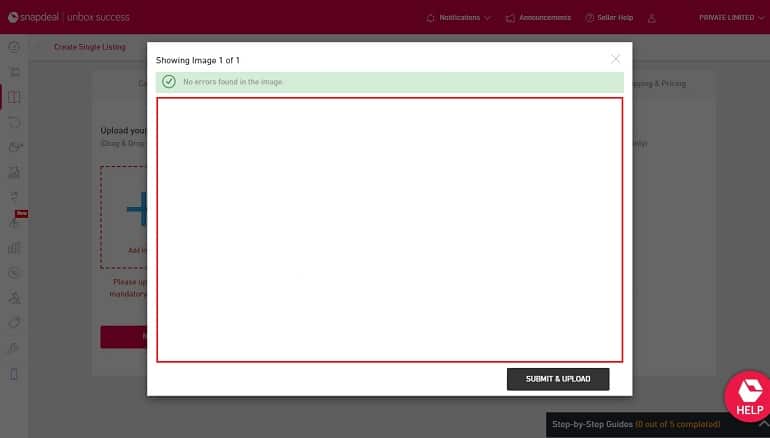
When you upload images the system will show preview in a separate window. Click submit and upload.
4. Attributes
The fields in the attribute section are highly dynamic. They keep changing depending on the product category. For example, I have selected the Food category. Hence, the attribute section will ask the FSSAI license number. Above all the whole section is divided into 2 sub-sections viz – Mandatory and Optional.
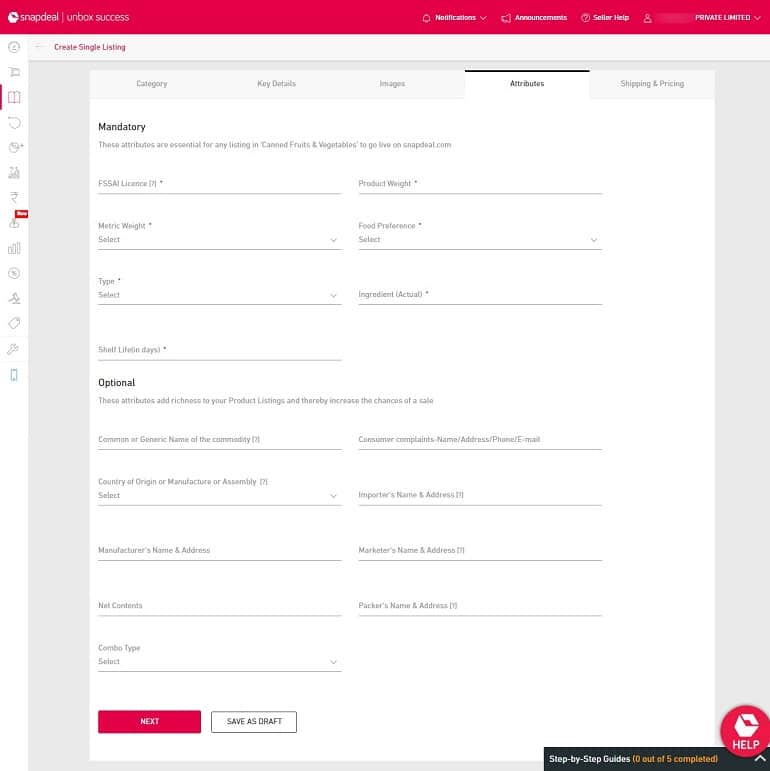
Although the system has termed certain product details as optional do not leave it blank. Fill in all the details. A full-fledged product listing loaded with required product info tends to rank high. eCommerce marketplaces like Snapdeal are customer-obsessed.
They will definitely showcase product listings to their buyers having useful info. Above all these details are there for a reason. The marketplace has designed a system around it. Hence, do not leave any space blank. Click next once you’re done with it.
5. Shipping & Pricing
Enter product MRP, selling price, inventory, shipping time, and dimensions along with product weight. Technically speaking you have created a product on Snapdeal. It’s just a couple of clicks now and the product shall go LIVE on Snapdeal.
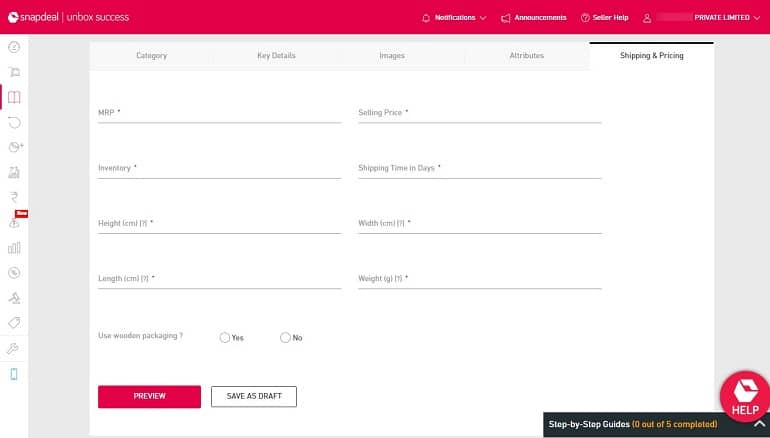
Either use the save as draft option to make products LIVE later or preview it. The preview option shows how a product will look on the buyer’s page. Refer to the image below.
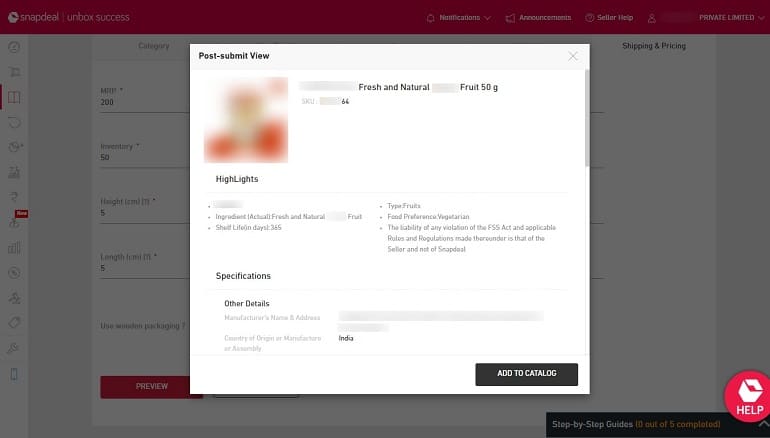
Look carefully for potential errors in the preview listing window. If there are errors revert back to rectify the same. Finally, hit the add to the catalog button. You have successfully created and listed your first product on Snapdeal. Refer to the track listings page image below
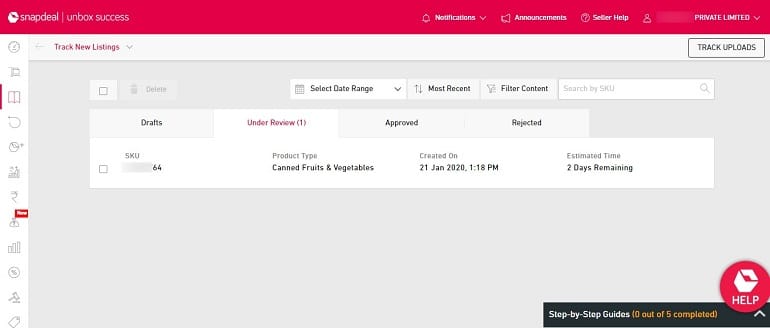
Track Listings Overview
As soon as you add products to the catalog the system takes time to review them. Look at the image above. Although the estimated time is 2 days the approval process is fast. Your product is approved within an hour provided there are no errors.

Those products saved as drafts or rejected will simultaneously display here. See the image above. I created 2 individual listings and both were approved in no time. Hence, listing, editing, and product approval process are easy and fast on Snaodeal.
How Do I Perceive Product Listings on Snapdeal?
There are no amicable reasons for me to go ga-ga over Snapdeal. I am a staunch Amazonite. Though I would recommend you to register as a seller on Snapdeal if you haven’t done it yet.
Not only registration but also list products. There’s nothing a seller will lose because the listing is completely free. Additionally, the marketplace approval process is faster.
Who knows you may get your first order in a few minutes after the product is LIVE.
